
WeUI is a UI suite developed by WeChat Web Service. It currently contains 12 modules (Button, Cell, What knowledge can be learned through WeChats WeUI?, What knowledge can be learned through WeChats WeUI?, Progress, What knowledge can be learned through WeChats WeUI?, What knowledge can be learned through WeChats WeUI?, What knowledge can be learned through WeChats WeUI?, What knowledge can be learned through WeChats WeUI?, What knowledge can be learned through WeChats WeUI?, Tab, What knowledge can be learned through WeChats WeUI?).
Demo page: https://weui.io
Github page: https://github.com/weui/weui
Let’s talk about the CSS skills I learned from WeUI.
From here I started to notice that in the implementation of WeUI, many borders are drawn using :before,:after.
.weui_btn:after {
    content: " ";
    width: 200%;
    height: 200%;
    position: absolute;
    top: 0;
    left: 0;
    border: 1px solid rgba(0, 0, 0, 0.2);
    -webkit-transform: scale(0.5);
    transform: scale(0.5);
    -webkit-transform-origin: 0 0;
    transform-origin: 0 0;
    box-sizing: border-box;
    border-radius: 10px;
}This is done to ensure that 1px is really 1pixel on the Retina screen.
.weui_cell {
    padding: 10px 15px;
    position: relative;
    display: -webkit-box;
    display: -webkit-flex;
    display: -ms-flexbox;
    display: flex;
    -webkit-box-align: center;
    -webkit-align-items: center;
    -ms-flex-align: center;
    align-items: center;
}Seeing this, I found that WeUI uses a lot of flex layout.

I have been confused before about how to implement a border with some gaps on the left between list items. The border property does not support displaying only part of one side. Do I need to insert
The implementation of WeUI is: using .weui_cells:before.
.weui_cell:before {
    content: " ";
    position: absolute;
    left: 15px;
    top: 0;
    width: 100%;
    height: 1px;
    border-top: 1px solid #D9D9D9;
    color: #D9D9D9;
    -webkit-transform-origin: 0 0;
    transform-origin: 0 0;
    -webkit-transform: scaleY(0.5);
    transform: scaleY(0.5);
}left: 15px (vacancy on the left) and overflow: hidden (hide the excess part on the right) of .weui_cells_title can display the border with vacancies.
The implementation of the right arrow at the end of the list item turned out to be a border rotated 45 degrees by weui_cell_ft::after. I thought I would use iconfont.
.weui_cells_access .weui_cell_ft:after {
    content: " ";
    display: inline-block;
    -webkit-transform: rotate(45deg);
    transform: rotate(45deg);
    height: 6px;
    width: 6px;
    border-width: 2px 2px 0 0;
    border-color: #C8C8CD;
    border-style: solid;
    position: relative;
    top: -2px;
    top: -1px;
    margin-left: .3em;
}
A hidden
<input type="radio" class="weui_check" name="radio1">
is embedded inside each line The hiding method is:
.weui_check {
    position: absolute;
    left: -9999em;
}A span.input.weui_check and .weui_icon_checked are placed behind each input.weui_check to display a check. They are brothers.
<span class="weui_icon_checked"></span>
.weui_cells_radio .weui_check:checked + .weui_icon_checked:before {
    display: block;
    content: '\EA08';
    color: #09BB07;
    font-size: 16px;}
The check box is hidden like the radio button above.
<input type="checkbox" class="weui_check" name="checkbox1">
What is more surprising to me is that the selected and unselected effects are both achieved using iconfont. I thought that the unselected effect is achieved using border, and the selected effect uses a check iconfont with horizontal and vertical centering.
/* 选中效果 */.weui_cells_checkbox .weui_check:checked + .weui_icon_checked:before {
    content: '\EA06';
    color: #09BB07;}/* 未选中效果 */.weui_cells_checkbox .weui_icon_checked:before {
    content: '\EA01';
    color: #C9C9C9;
    font-size: 23px;
    display: block;}
<input class="weui_switch" type="checkbox">
I thought this effect was difficult to achieve before, but after seeing weui’s implementation, it only uses css!
.weui_switch {
  -webkit-appearance: none;
  -moz-appearance: none;
  appearance: none;
  position: relative;
  width: 52px;
  height: 32px;
  border: 1px solid #DFDFDF;
  outline: 0;
  border-radius: 16px;
  box-sizing: border-box;
  background: #DFDFDF;}.weui_switch:checked {
  border-color: #04BE02;
  background-color: #04BE02;}.weui_switch:before {
  content: " ";
  position: absolute;
  top: 0;
  left: 0;
  width: 50px;
  height: 30px;
  border-radius: 15px;
  border-top-left-radius: 15px;
  border-top-right-radius: 15px;
  border-bottom-right-radius: 15px;
  border-bottom-left-radius: 15px;
  background-color: #FDFDFD;
  -webkit-transition: -webkit-transform .3s;
  transition: -webkit-transform .3s;
  transition: transform .3s;
  transition: transform .3s, -webkit-transform .3s;}.weui_switch:checked:before {
  -webkit-transform: scale(0);
  transform: scale(0);}.weui_switch:after {
  content: " ";
  position: absolute;
  top: 0;
  left: 0;
  width: 30px;
  height: 30px;
  border-radius: 15px;
  background-color: #FFFFFF;
  box-shadow: 0 1px 3px rgba(0, 0, 0, 0.4);
  -webkit-transition: -webkit-transform .3s;
  transition: -webkit-transform .3s;
  transition: transform .3s;
  transition: transform .3s, -webkit-transform .3s;}.weui_switch:checked:after {
  -webkit-transform: translateX(20px);
transform: translateX(20px);}Among them, .weui_switch provides a border, the background color is #DFDFDF (dark gray) when not selected, and #04BE02 (green) when selected.
.weui_switch:before provides the light gray #FDFDFD inside the border. When selected, scale(0) shrinks and disappears.
.weui_switch:after provides a circular button. When selected, move 20px to the right.
The effect is as follows:
 ##
##
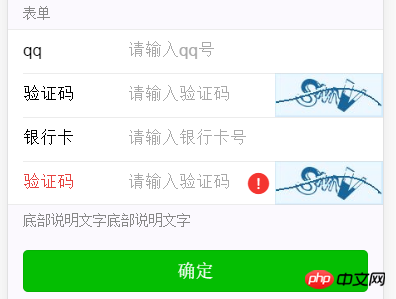
<input class="weui_input" type="number" pattern="[0-9]*" placeholder="请输入qq号">
.weui_input::-webkit-outer-spin-button,.weui_input::-webkit-inner-spin-button {
  -webkit-appearance: none;
  margin: 0;}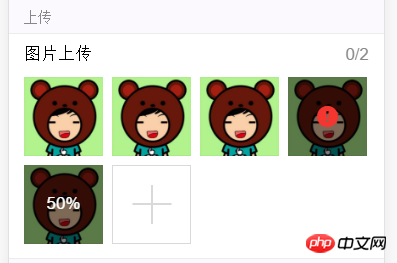
.weui_uploader_status:before {
    content: " ";
    position: absolute;
    top: 0;
    right: 0;
    bottom: 0;
    left: 0;
background-color: rgba(0, 0, 0, 0.5);}.weui_uploader_status .weui_uploader_status_content {
position: absolute;
top: 50%;
left: 50%;
-webkit-transform: translate(-50%, -50%);
transform: translate(-50%, -50%);
color: #FFFFFF;}.vertical-center {
position: relative;
top: 50%;
transform: translateY(-50%);}<p class="weui_uploader_input_wrp">
<input class="weui_uploader_input" type="file" accept="image/jpg,image/jpeg,image/png,image/gif" multiple="">
</p>真正的input利用opacity:0隐藏起来了.
.weui_uploader_input_wrp:before {
    width: 2px;
    height: 39.5px;
}
.weui_uploader_input_wrp:after {
    width: 39.5px;
    height: 2px;
}
.weui_uploader_input_wrp:before,
.weui_uploader_input_wrp:after {
    content: " ";
    position: absolute;
    top: 50%;
    left: 50%;
    -webkit-transform: translate(-50%, -50%);
    transform: translate(-50%, -50%);
    background-color: #D9D9D9;
}
.weui_uploader_input {
    position: absolute;
    z-index: 1;
    top: 0;
    left: 0;
    width: 100%;
    height: 100%;
    opacity: 0;
    -webkit-tap-highlight-color: rgba(0, 0, 0, 0);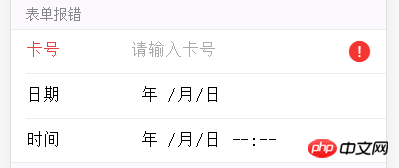
<input class="weui_input" type="date" value="">
<input class="weui_input" type="datetime-local" value="" placeholder="">
在iOS上, 点选input[type="date"]会出现"年-月-日"的What knowledge can be learned through WeChats WeUI?框, 点选input[type="datetime-local"]会出现"月-日-上午/下午-时-分"的What knowledge can be learned through WeChats WeUI?框.
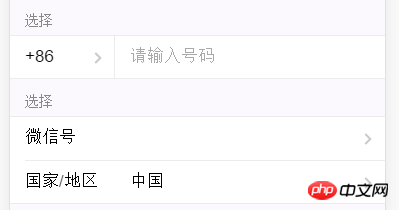
电话号码+86位置的右箭头和分割线是用:before和:after绘制的.
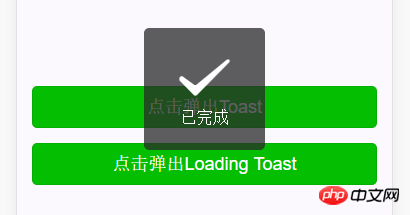
<p id="toast"   style="max-width:90%">
    <p class="weui_mask_transparent"></p>
    <p class="weui_toast">
        <i class="weui_icon_toast"></i>
        <p class="weui_toast_content">已完成</p>
    </p>
</p>.weui_mask_transparent就是一个position:fixed占满全屏的透明幕布, 让用户无法操作界面.
.weui_toast才是页面中间的黑块.
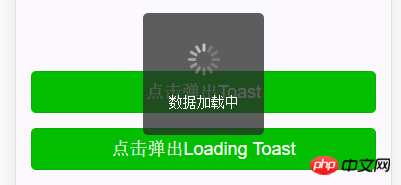
竟然是纯用HTML+CSS(animation+transition)实现的.
<p id="loadingWhat knowledge can be learned through WeChats WeUI?" class="weui_loading_toast" style="/* display: none; */">
    <p class="weui_mask_transparent"></p>
    <p class="weui_toast">
        <p class="weui_loading">
            <p class="weui_loading_leaf weui_loading_leaf_0"></p>
            <p class="weui_loading_leaf weui_loading_leaf_1"></p>
            <p class="weui_loading_leaf weui_loading_leaf_2"></p>
            <p class="weui_loading_leaf weui_loading_leaf_3"></p>
            <p class="weui_loading_leaf weui_loading_leaf_4"></p>
            <p class="weui_loading_leaf weui_loading_leaf_5"></p>
            <p class="weui_loading_leaf weui_loading_leaf_6"></p>
            <p class="weui_loading_leaf weui_loading_leaf_7"></p>
            <p class="weui_loading_leaf weui_loading_leaf_8"></p>
            <p class="weui_loading_leaf weui_loading_leaf_9"></p>
            <p class="weui_loading_leaf weui_loading_leaf_10"></p>
            <p class="weui_loading_leaf weui_loading_leaf_11"></p>
        </p>
        <p class="weui_toast_content">数据加载中</p>
</p></p>.weui_loading_leaf {
position: absolute;
top: -1px;
opacity: 0.25;}.weui_loading_leaf:before {
content: " ";
position: absolute;
width: 8.14px;
height: 3.08px;
background: #d1d1d5;
box-shadow: rgba(0, 0, 0, 0.0980392) 0px 0px 1px;
border-radius: 1px;
-webkit-transform-origin: left 50% 0px;
transform-origin: left 50% 0px;}.weui_loading_leaf_0 {
-webkit-animation: opacity-60-25-0-12 1.25s linear infinite;
animation: opacity-60-25-0-12 1.25s linear infinite;}.weui_loading_leaf_0:before {
-webkit-transform: rotate(0deg) translate(7.92px, 0px);
transform: rotate(0deg) translate(7.92px, 0px);}/* ... */.weui_loading_leaf_11 {
-webkit-animation: opacity-60-25-11-12 1.25s linear infinite;
animation: opacity-60-25-11-12 1.25s linear infinite;}.weui_loading_leaf_11:before {
-webkit-transform: rotate(330deg) translate(7.92px, 0px);
transform: rotate(330deg) translate(7.92px, 0px);}@-webkit-keyframes opacity-60-25-0-12 {
0% {
opacity: 0.25;
}
0.01% {
opacity: 0.25;
}
0.02% {
opacity: 1;
}
60.01% {
opacity: 0.25;
}
100% {
opacity: 0.25;
}}/* ... */@-webkit-keyframes opacity-60-25-11-12 {
0% {
opacity: 0.895958333333333;
}
91.6767% {
opacity: 0.25;
}
91.6867% {
opacity: 1;
}
51.6767% {
opacity: 0.25;
}
100% {
opacity: 0.895958333333333;
}}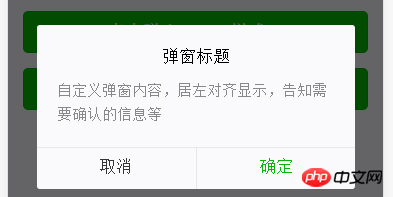
<p class="weui_dialog_confirm" id="dialog1">
    <p class="weui_mask"></p>
    <p class="weui_dialog">
        <p class="weui_dialog_hd"><strong class="weui_dialog_title">弹窗标题</strong></p>
        <p class="weui_dialog_bd">自定义弹窗内容,居左对齐显示,告知需要确认的信息等</p>
        <p class="weui_dialog_ft">
            <a href="javascript:;" class="weui_btn_dialog default">取消</a>
            <a href="javascript:;" class="weui_btn_dialog primary">确定</a>
        </p>
</p></p>你能看到的边框都是用:after实现的.
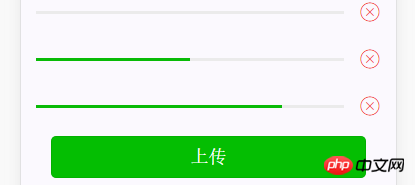
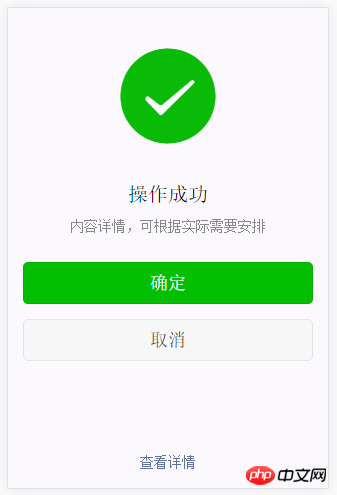
略. ( *・ω・)✄╰ひ╯
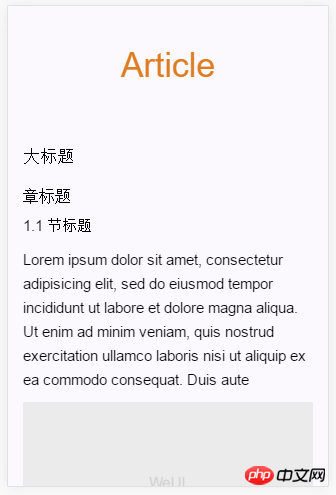
略. ( *・ω・)✄╰ひ╯
略. ( *・ω・)✄╰ひ╯
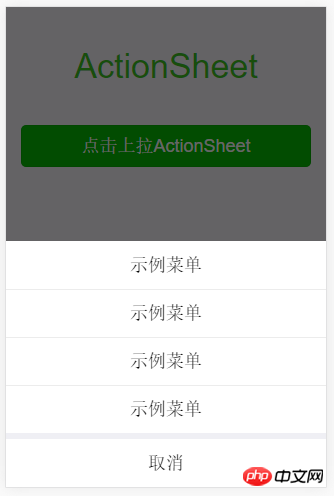
<p id="actionSheet_wrap">
    <p class="weui_mask_transition" id="mask" style="display: none;"></p>
    <p class="weui_actionsheet" id="weui_actionsheet">
        <p class="weui_actionsheet_menu">
            <p class="weui_actionsheet_cell">示例菜单</p>
            <p class="weui_actionsheet_cell">示例菜单</p>
            <p class="weui_actionsheet_cell">示例菜单</p>
            <p class="weui_actionsheet_cell">示例菜单</p>
        </p>
        <p class="weui_actionsheet_action">
            <p class="weui_actionsheet_cell" id="actionsheet_cancel">取消</p>
        </p>
    </p>
</p>值得一提的是, 页面下方的What knowledge can be learned through WeChats WeUI?始终是显示的, 只不过平时通过transform: translateY(100%)隐藏了起来, 显示时用translateY(0). 这方法无需JS就可以自适应任意高度的What knowledge can be learned through WeChats WeUI?.
.weui_actionsheet {
    position: fixed;
    left: 0;
    bottom: 0;
    -webkit-transform: translate(0, 100%);
    transform: translate(0, 100%);
    -webkit-backface-visibility: hidden;
    backface-visibility: hidden;
    z-index: 2;
    width: 100%;
    background-color: #EFEFF4;
    -webkit-transition: -webkit-transform .3s;
    transition: -webkit-transform .3s;
    transition: transform .3s;
    transition: transform .3s, -webkit-transform .3s;
}
.weui_actionsheet_toggle {
    -webkit-transform: translate(0, 0);
    transform: translate(0, 0);
}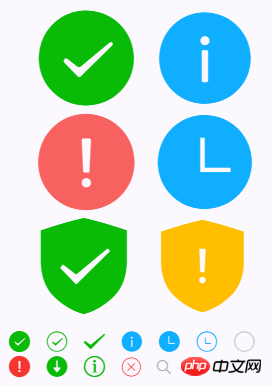
一堆iconfont. ( *・ω・)✄╰ひ╯
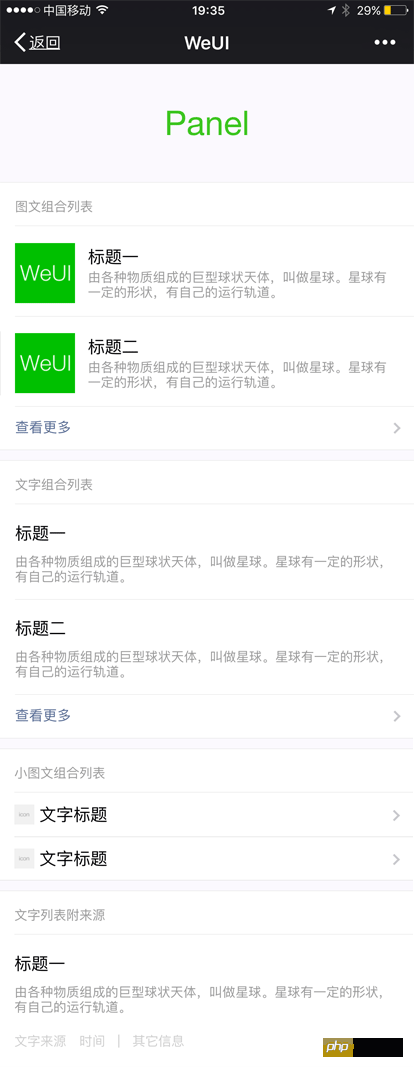
略. ( *・ω・)✄╰ひ╯
Navbar:

What knowledge can be learned through WeChats WeUI?:

略. ( *・ω・)✄╰ひ╯
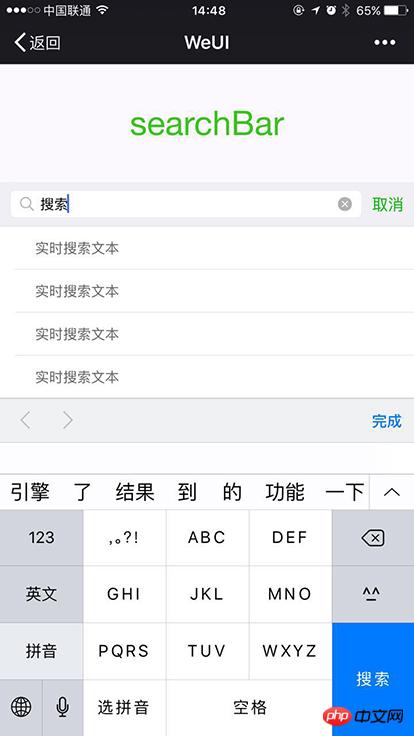
无焦点状态:

有焦点状态:
<p class="weui_search_bar weui_search_focusing" id="search_bar">
    <form class="weui_search_outer">
        <!-- 搜索框有焦点时的搜索图标, 搜索框和清空按钮 -->
        <p class="weui_search_inner">
            <i class="weui_icon_search"></i>
            <input type="search" class="weui_search_input" id="search_input" placeholder="搜索" required="">
            <a href="javascript:" class="weui_icon_clear" id="search_clear"></a>
        </p>
        <!-- 搜索框没有焦点时的显示 -->
        <label for="search_input" class="weui_search_text" id="search_text">
            <i class="weui_icon_search"></i>
            <span>搜索</span>
        </label>
    </form>
    <!-- 搜索框有焦点时的取消键 -->
    <a href="javascript:" class="weui_search_cancel" id="search_cancel">取消</a>
</p>这里我最好奇的是, 当用户点击搜索框时, 弹出的键盘上右下角的按键是"搜索"而不是"换行".
我测试的效果是, 在微信中点击搜索框时键盘显示"搜索"按键, 在Safari中打开时则显示"换行".
这就很诡异了, 说明微信做了什么手脚. 难道与JS有关?
但是我在网上搜索了下, 发现只要确保input[type="search"]被form包围, 且form有action属性即可. 示例:
<form action="">
  <input type="search" name="search" placeholder="search">
</form>
但是WeUI的实现中,form并没有action属性, 所以暂时不知道WeUI是如何做的.
相关文章:
通过微信WEUI实现图片What knowledge can be learned through WeChats WeUI?,后台PHP该如何处理?
WEUI application JS common information prompt pop-up layer encapsulation
The above is the detailed content of What knowledge can be learned through WeChat's WeUI?. For more information, please follow other related articles on the PHP Chinese website!
 What is the reason why the computer screen is black but the computer is on?
 How to cast screen from Huawei mobile phone to TV
 How to open .dat files
 How to open an account with u currency
 The difference between arrow functions and ordinary functions
 Can program files be deleted?
 What is the difference between pass by value and pass by reference in java
 chip
chip


