


Front-end framework has been a particularly hot topic in recent years, especially Angular 2 which has many fans. After Angular 2 was officially released in September 2016, a large number of fans began to invest in Angular 2. Of course this includes me. If you want to learn about Angular 2, we recommend the official website: English version, Chinese version. Get started quickly with Angular 2.
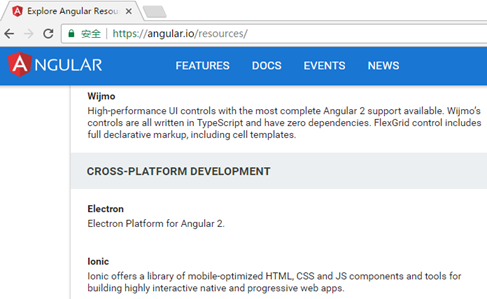
A project of the company wants to be developed based on Angular 2 version 2.4, which is currently in the early research stage. My task is to study UI controls based on Angular 2. There are many resources that support Angular 2 listed in the resources on the official website. We found that Wijmo's Flexgrid control already supports version 2.4 of Angular 2, which initially meets our needs.
1. Environment setup
Angular 2 is not only very different from Angular 1 in terms of functionality, but also in environment setup. big. Many beginners report that Angular 2 code is difficult to run. Angular2 is developed based on ES6, so there will be many third-party dependencies. Since many browsers do not yet support ES6, Angular2 introduced a lot of polyfills or shims, causing us to introduce third-party dependencies. The following uses FlexGrid as an example to illustrate how to set up a running environment.
1. To install NodeJS
, you can download it from the Node official website //m.sbmmt.com/.
2. Create a new directory to store the project
mkdir ng2-flexGrid
cd ng2-flexGrid
3. Configuration file
package.json
is used to mark the npm dependency packages that the project needs to use.
{ "name": "wj-ng2-flexgrid", "version": "1.0.0", "scripts": { "start": "tsc && concurrently \"tsc -w\" \"lite-server\" ", "lite": "lite-server", "tsc": "tsc", "tsc:w": "tsc -w" }, "licenses": [ { "type": "MIT", "url": "https://github.com/angular/angular.io/blob/master/LICENSE" } ], "dependencies": { "@angular/common": "~2.1.1", "@angular/compiler": "~2.1.1", "@angular/core": "~2.1.1", "@angular/forms": "~2.1.1", "@angular/http": "~2.1.1", "@angular/platform-browser": "~2.1.1", "@angular/platform-browser-dynamic": "~2.1.1", "@angular/router": "~3.1.1", "@angular/upgrade": "~2.1.1", "angular-in-memory-web-api": "~0.1.13", "core-js": "^2.4.1", "reflect-metadata": "^0.1.8", "rxjs": "5.0.0-beta.12", "systemjs": "0.19.39", "zone.js": "^0.6.25" }, "devDependencies": { "@types/core-js": "^0.9.34", "@types/node": "^6.0.45", "concurrently": "^3.0.0", "lite-server": "^2.2.2", "typescript": "^2.0.3" } }
tsconfig.json
TypeScript configuration file , defines how the TypeScript compiler generates JavaScript code from project source files.
{ "compilerOptions": { "target": "es5", "module": "commonjs", "moduleResolution": "node", "sourceMap": true, "emitDecoratorMetadata": true, "experimentalDecorators": true, "removeComments": false, "noImplicitAny": false } }
systemjs.config.js
for SystemJS (Module loader) provides information on where to find application modules and registers all necessary dependency packages.
/** * System configuration for Angular samples * Adjust as necessary for your application needs. */ (function (global) { System.config({ paths: { // paths serve as alias 'npm:': 'node_modules/' }, // map tells the System loader where to look for things map: { // our app is within the app folder app: 'app', // angular bundles '@angular/core': 'npm:@angular/core/bundles/core.umd.js', '@angular/common': 'npm:@angular/common/bundles/common.umd.js', '@angular/compiler': 'npm:@angular/compiler/bundles/compiler.umd.js', '@angular/platform-browser': 'npm:@angular/platform-browser/bundles/platform-browser.umd.js', '@angular/platform-browser-dynamic': 'npm:@angular/platform-browser-dynamic/bundles/platform-browser-dynamic.umd.js', '@angular/http': 'npm:@angular/http/bundles/http.umd.js', '@angular/router': 'npm:@angular/router/bundles/router.umd.js', '@angular/forms': 'npm:@angular/forms/bundles/forms.umd.js', '@angular/upgrade': 'npm:@angular/upgrade/bundles/upgrade.umd.js', // other libraries 'rxjs': 'npm:rxjs', 'angular-in-memory-web-api': 'npm:angular-in-memory-web-api/bundles/in-memory-web-api.umd.js' }, // packages tells the System loader how to load when no filename and/or no extension packages: { app: { main: './main.js', defaultExtension: 'js' }, rxjs: { defaultExtension: 'js' } } }); })(this);
4. Run npm install
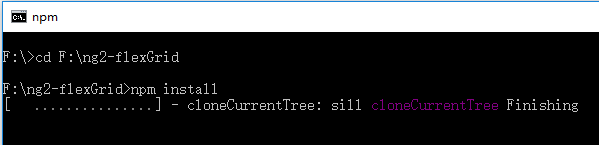
NPM will install according to the package defined in package.json. A node_modules directory will be generated and these packages will be placed here.
At this point, the task of setting up the environment has been completed. Below we take FlexGrid as an example to illustrate support for Angular 2.
2. How to use the table control that supportsAngular 2
1. HTML
使用 Angular 2 来创建FlexGrid控件 Loading
In the HTML host page, in addition to the necessary components in Angular 2, Wijmo scripts also need to be introduced.
2. Write data service
'use strict' import { Injectable } from '@angular/core'; @Injectable() export class DataService { getData(count: number): wijmo.collections.ObservableArray { var countries = 'US,Germany,UK,Japan,Italy,Greece'.split(','), data = new wijmo.collections.ObservableArray(); for (var i = 0; i < count; i++) { data.push({ id: i, country: countries[i % countries.length], date: new Date(2014, i % 12, i % 28), amount: Math.random() * 10000, active: i % 4 == 0 }); } return data; } }
3. Write root component
Now we write the first component of the application: the root component app.component, which is also the only component of this program. In this component, two meta tags need to be introduced: Component, Inject. You also need to inject the defined data service data.Service.
app.component.ts:
import { Component, Inject } from '@angular/core'; import { DataService } from '../services/data.service'; @Component ({ selector:'app-cmp', templateUrl:'app/components/app.component.html', }) export class AppComponent{ protected dataSvc:DataService; data: wijmo.collections.CollectionView; constructor(@Inject(DataService) dataSvc:DataService){ this.dataSvc = dataSvc; this.data = new wijmo.collections.CollectionView(this.dataSvc.getData(50)); } }
app.component.html:
展示如何在angular 2上使用 Wijmo的FlexGrid。
Here you only need to introduce the wj-flex-grid tag to create the FlexGrid control. The wj-flex-grid component exists as a subcomponent and is injected in the app.module module. itemsSource binds a data source. This itemsSource is an encapsulated property of flexgrid.
The biggest benefit of using FlexGrid under Angular 2 is that Angular 2 components provide the ability to use markup language to declare controls. Declaration markup follows the MVVM design pattern well, and we can configure our components entirely through View (markup language). FlexGrid supports using the Angular 2 markup language to declare a complete API. You can set properties, attach events, and configure subcomponents entirely using markup language.
4. Write the root module
Inject components into the root module. All referenced components and modules need to be injected.
import { NgModule } from '@angular/core'; import { BrowserModule } from '@angular/platform-browser'; import { WjGridModule } from 'wijmo/wijmo.angular2.grid'; import { AppComponent } from './components/app.component'; import { DataService } from './services/data.service'; @NgModule({ imports: [ WjGridModule, BrowserModule], declarations: [AppComponent], providers:[DataService], bootstrap: [AppComponent], }) export class AppModule { }
5. Boot program
main.ts:
import { platformBrowserDynamic } from '@angular/platform-browser-dynamic'; import {enableProdMode} from '@angular/core'; import { AppModule } from './app.module'; enableProdMode(); platformBrowserDynamic().bootstrapModule(AppModule);
3. Run
Execute npm start on the command line. At this time, the program will automatically open the default browser and render the page.
The start command is to execute the scripts command defined in the package.json file. The ts code will be compiled into native js and a static server will be started. This server will detect file changes. When a file change is found, the ts code will be automatically compiled.
The following is the result of the operation:
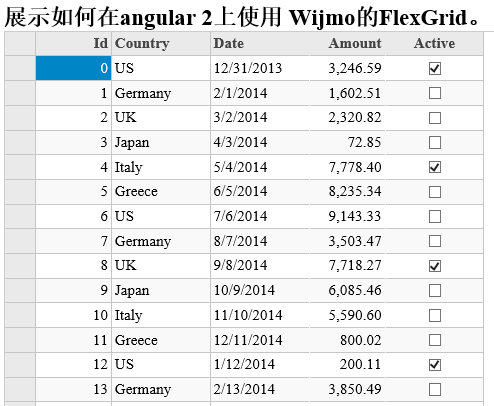
FlexGrid has built-in basic functions such as sorting, filtering, grouping, editing, etc., and can also provide other functions through optional extensions. Compared with other products, FlexGrid's performance is quite good. Its file size is relatively small, about 25K after compression.
Download source code
The above is the content of the table control that supports Angular 2. For more related content, please pay attention to the PHP Chinese website (m.sbmmt.com)!
 What are the computer performance online testing software?
 How to solve http status 404
 The role of php probe
 Commonly used mysql management tools
 The difference and connection between java and javascript
 Which platform is better for virtual currency trading?
 What does unsigned integer mean?
 httpstatus500 error solution


![[Web front-end] Node.js quick start](https://img.php.cn/upload/course/000/000/067/662b5d34ba7c0227.png)


