
PHP_GTK2.0 Develop desktop applications
php gtk official website
gtk.php.net/
For the official Chinese manual of gtk, please refer to the manual
A simpler method is to use another software called gnope
Download address: www.gnope.org/download.php
The installation process is very simple. After installation, There will be a shortcut icon for PHP-Gtk2 Applications on the desktop
Double-click the icon and a php desktop program will appear, which lists all demos, control demonstrations and games (provided that you choose to install games during installation) )
Detailed explanation of application:
www.16ec.com/tp15/site/index.php and http://blog.csdn.net/zhangking/archive/2010/08/20 /5825416.aspx
After seeing these programs, you can’t wait to write a desktop application yourself
Here is a simple login program:
Php Code
<?php
if (!class_exists(‘gtk’)) {
die("lease load the php-gtk2 module in your php.ini\r\n");
}
function login(GtkWindow $wnd, GtkEntry $txtUsername, GtkEntry $txtPassword)
{
$strUsername = $txtUsername->get_text();
$strPassword = $txtPassword->get_text();
$errors = null;
if (strlen($strUsername) == 0) {
$errors .= "Username is missing.\r\n";
}
if (strlen($strPassword) == 0) {
$errors .= "No password given.\r\n";
}
if ($errors !== null) {
$dialog = new GtkMessageDialog($wnd, Gtk::DIALOG_MODAL,
Gtk::MESSAGE_ERROR, Gtk::BUTTONS_OK, $errors);
$dialog->set_markup(
"The following errors occured:\r\n"
. "<span foreground=’red’>" . $errors . "</span>"
);
$dialog->run();
$dialog->destroy();
}
else {
$wnd->destroy();
}
}
$wnd = new GtkWindow();
$wnd->set_title(‘Login’);
$wnd->connect_simple(‘destroy’, array(‘gtk’, ‘main_quit’));
$txtUsername = new GtkEntry();
$txtPassword = new GtkEntry();
$lblUsername = new GtkLabel(‘_Username’,true);
$lblPassword = new GtkLabel(‘_Password’,true);
$btnLogin = new GtkButton(‘_Login’);
$btnCancel = new GtkButton(‘_Cancel’);
$lblUsername->set_mnemonic_widget($txtUsername);
$lblPassword->set_mnemonic_widget($txtPassword);
$btnCancel->connect_simple(‘clicked’,array($wnd,’destroy’));
$btnLogin->connect_simple(‘clicked’,'login’,$wnd,$txtUsername,$txtPassword);
$tbl = new GtkTable(3,2);
$tbl->attach($lblCredit,0,2,0,1);
$tbl->attach($lblUsername,0,1,1,2);
$tbl->attach($txtUsername,1,2,1,2);
$tbl->attach($lblPassword,0,1,2,3);
$tbl->attach($txtPassword,1,2,2,3);
$bbox = new GtkHButtonBox();
$bbox->set_layout(Gtk::BUTTONBOX_EDGE);
$bbox->add($btnLogin);
$bbox->add($btnCancel);
$vbox = new GtkVBox();
$vbox->pack_start($tbl);
$vbox->pack_start($bbox);
$wnd->add($vbox);
//$lblHello = new GtkLabel("This is my first php talbe application\nhaha");
//$wnd->add($lblHello);
$wnd->show_all();
Gtk::main();
?>Installing using Gnope on Windows
Installing and maintaining PHP-GTK 2 on Windows using Gnope has proven to be almost the easiest way. Gnope is a full-featured PHP-GTK 2 installation package, including PHP 5.1, GTK 2.6 and PEAR. You can install it with just a few clicks of the mouse!
Just download the installation package from gnope.org and follow the on-screen instructions. Gnope also has its own PEAR autoinstallation channel, where you can download the PHP-GTK 2 program to add to the official PEAR package. For example from Gtk2 category .
Manual installation
Download the Alpha version binary distribution package of PHP-GTK 2 for Windows from the PHP-GTK 2 download page. Unzip the file to the specified directory. A directory called php-gtk will be created containing all the contents of the distribution.
You will need php.exe (CLI version) and php5ts.dll, both available from the Windows distribution of PHP 5 and placed in the php-gtk directory. If you wish to use other extensions to php.exe, please make sure you have placed the binaries here.
After that, you must set the environment variable PATH to include the gtk+2.6.9 directory in the distribution package. You can also have the batch file gtkpath.bat set the appropriate PATH variable for the current command line session at run time.
Compile from CVS
Here are only the most important steps to install PHP-GTK 2 on Windows. If you want to know more, grab win32/README.win32.txt from CVS and read it.
from: http://gtk.php.net/manual/zh_cn/html/tutorials/tutorials.installation.windows.html
=========== ==
WinBinder allows phper to develop desktop software in the window system
WinBinder is an open source PHP dynamic extension (.dll), which can also be regarded as a script programming language, providing PHP under the window system. The development provides the user interface UI, which is responsible for calling the window's API interface. It runs PHP programmers to easily create Windows applications using PHP. Of course, this only runs under Windows. It is a software in itself, and PHP programmers can develop interfaces through this software. The official website says very well that there is no need to compile php. Just save the file with the extension .phpw and then open it with php.exe to run it. How you feel about the specific development will only be known after you try it out. The initial feeling is that it will not be worse than php-gtk.
You can download the WinBinder package here. Download the .zip package. Generally, there is no need to use .exe. After downloading, unzip it and copy php_winbinder.dll in the winbinder_xxxPHPPHP4ext directory (if you are using PHP5, copy the PHP5 directory) to the PHP extension directory, usually in C:phpextensions, then modify the php.ini file and add:
extension=php_winbinder.dll
Then open the command line (cmd), enter the winbinder_xxxCodeSamples directory, run:
C:phpcliphp.exe manytests_main.phpw
In this way, you can see the Windows window. There are many examples for testing, you can try them all. I tried Chinese, and it still supports pretty well. Think about it, WinBinder is loaded into PHP through an extension, and it calls Windows APIs. In fact, WinBinder can be divided into two layers. The first layer is the bottom layer, called the API layer. As a PHP extension, it directly connects to the Windows API and provides a unified calling interface for the second layer (higher layer, called the PHP layer).
Hello, world code example
<?php
include("../inc/winbinder.php");                                // 包含 WinBinder PHP 库文件
wb_create_window(NULL, PopupWindow, "Hello world!", 480, 320); // 创建 Windows 应用程序
wb_main_loop();                                                 // 进入消息循环
?>Installation and configuration of winbinder installation version
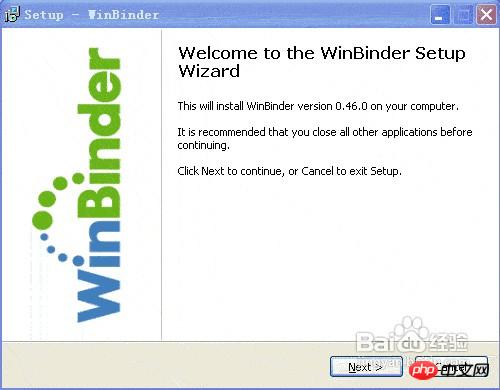
First go to http://winbinder.org/files/WinBinder-0.46. 0.exe download winbinder, this is an installation version, double-click to install after downloading.
1, next
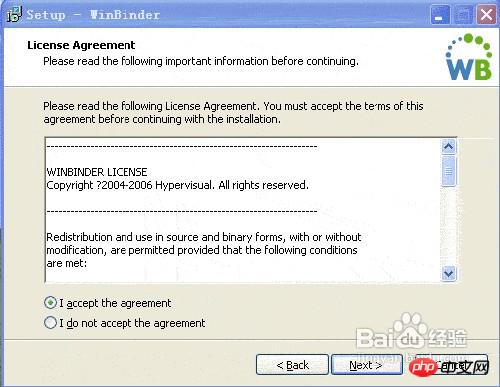
2, next
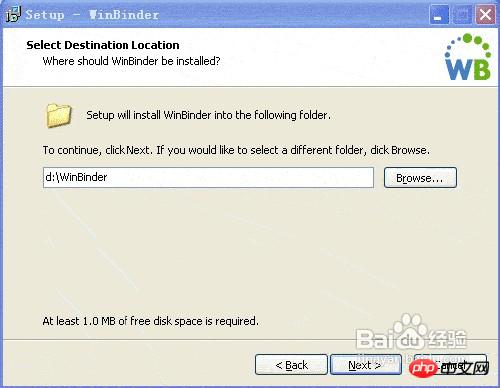
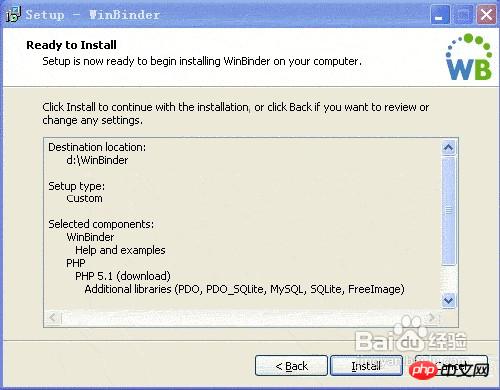
3, select the installation path and then next, What I choose here is d;/winbinder
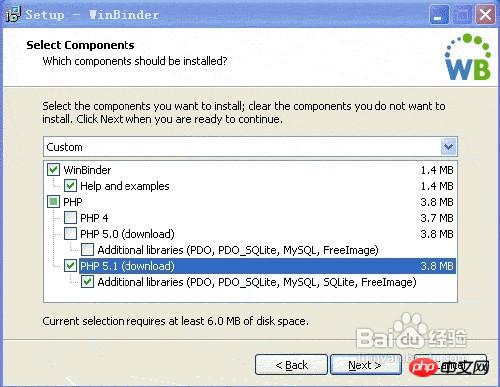
4. Select the version of php. What I have here is php5.1
5. Choose the download server. It is faster to choose Taiwan (there are only Taiwan options and no Chinese ones, I am angry)
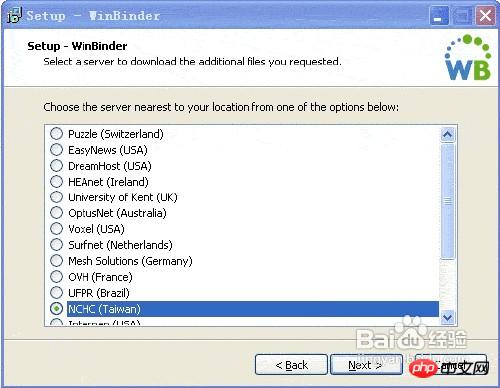
6, next
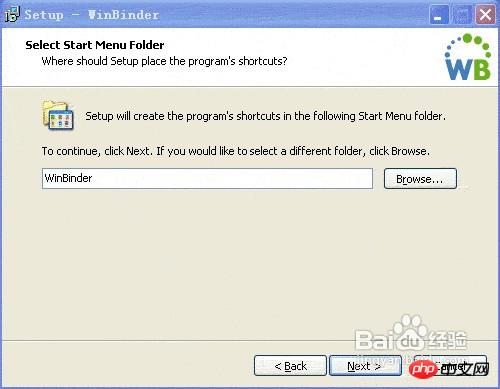
7, install
8, wait
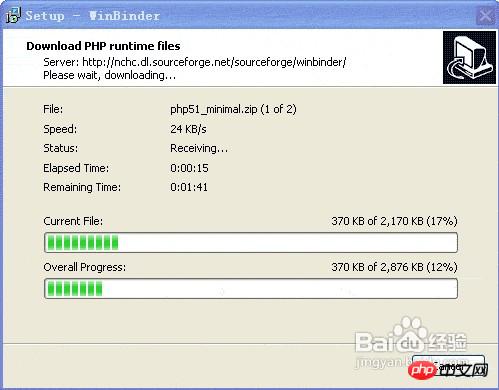
9. After the installation is completed, just click Confirm. You can do step 10.
10. After installation, open D:WinBinderphpcodeexamples, find a file with a .phpw extension, and select the opening method as D:WinBinderbinariesphp51php-win.exe.
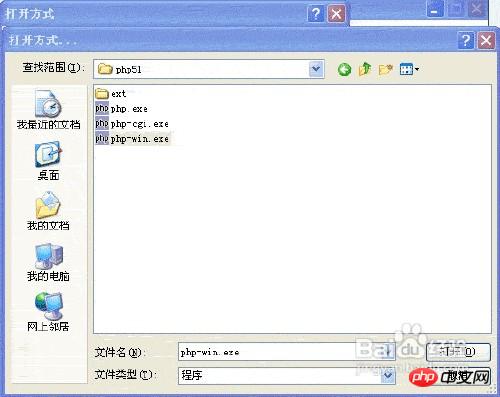
You can now run files with the .phpw extension. For example
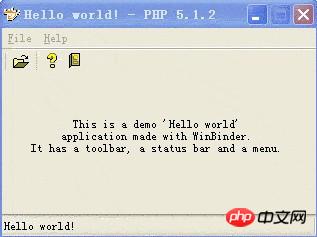
Here are a few questions to explain
1: There are three opening methods we can choose, namely php.exe php-win.exe php -cgi.exe If the opening method is php-cgi.exe
, then a command prompt window will appear when running. In actual applications, this window may seem redundant, but It is very useful when debugging
It can prompt you for errors in the program.
2: The opening method we just chose is the .exe file under D:WinBinderbinariesphp51. Some friends may want to ask, why can't we choose the php that has been installed in this machine (assuming it is D:/php) What about the .exe file in the folder? In fact, it is possible, but there is a problem here. If you select the .exe file in the php folder, then it uses the php.ini configuration file under c:windows. In this case, the .dll file loaded when winbinder is running is actually Above are the files in the D:/php/ext/ folder. So at this time, you need to set the extension_dir in php.ini to ./ext because the ext folder is in the same folder as the .exe file (that is, the D:php folder). Then you need to put the php_winbinder.dll file in D:WinBinderbinariesphp51ext into D:phpext, and then add extension=php_winbinder.dll to the php.ini file under c:windows accordingly. In addition, if you need to use the corresponding library file, you need to remove the ; sign before the corresponding file name in php.ini. I think everyone knows this.
If you choose to open the .exe file under D:WinBinderbinariesphp51, it is not so troublesome. It uses the php.ini file under D:WinBinderbinariesphp51. You can use it without any configuration. But it only supports the two libraries mysql and sqlite by default. If you want to use other libraries such as gd, you need to modify the php.ini file under D:WinBinderbinariesphp51, and then put the corresponding library file (such as php_gd.dll) into D:WinBinderbinariesphp51ext.


