As a regular Obsidian user for writing articles, I found manually publishing Markdown content to DEV.to time-consuming. To streamline this, I developed a Python script that automates the process of publishing directly to DEV.to. In this guide, I’ll show you how to use Python and the DEV.to API to simplify your article publishing workflow.
Before we dive into the code, you’ll need the following:
• DEV API Key: You can generate this by logging into your DEV account and navigating to the API keys section.
• Python Installed: Ensure you have Python 3.x installed on your system.
We’ll break the process down into three steps:
Below is the complete Python script to automate the process of publishing an article to DEV.
import webbrowser
import requests
import json

# API headers including the DEV API key
headers_dev = {
    "Content-Type": "application/json",
    "api-key": API_KEY,  # Replace API_KEY with your actual DEV API key
}

# Function to read markdown content from a file
def get_markdown_content(markdown_path):
    with open(markdown_path, 'r') as file:
        markdown_content = file.read()
    return markdown_content

# Function to publish an article to DEV
def publish_article_dev(markdown_content):
    # Set up the payload with article data
    article_payload = {
        "article": {
            "title": "Your Article Title Here",  # Replace with the actual title
            "body_markdown": markdown_content,
            "published": False,
        }
    }

    # Make a POST request to DEV's API to publish the article
    response = requests.post(
        url='https://dev.to/api/articles',
        headers=headers_dev,
        data=json.dumps(article_payload)
    )

    # Check if the request was successful
    if response.status_code == 201:
        print("Article published successfully!")
        print("Response:", response.json())
        # Open the DEV dashboard in the browser
        webbrowser.open('https://dev.to/dashboard')
    else:
        print(f"Failed to publish article. Status code: {response.status_code}")
        print("Response:", response.json())

# Example usage:
# Replace 'path_to_your_markdown_file.md' with the actual path to your markdown file
markdown_content = get_markdown_content('path_to_your_markdown_file.md')
publish_article_dev(markdown_content)
Remember, if you set published: True, the article will be live and visible to the public on DEV. If you want to save the article as a draft for later editing or reviewing, set published: False. This gives you flexibility in managing your posts.
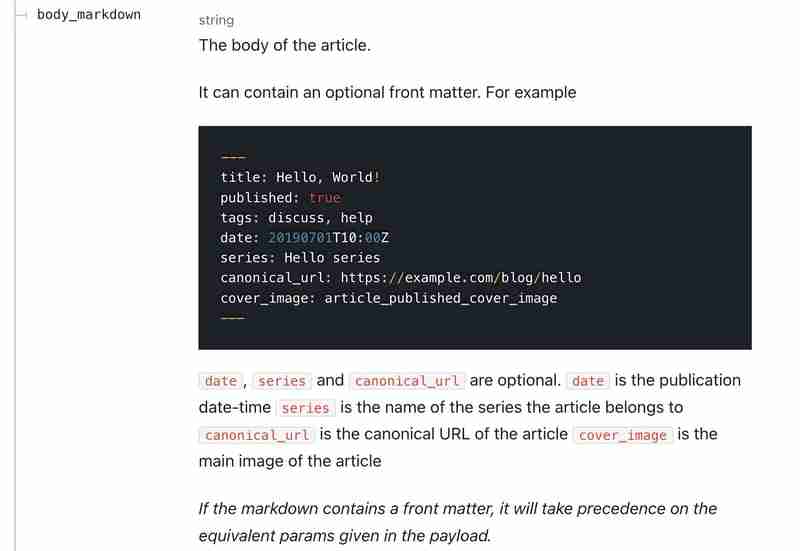
In the body_markdown of your DEV article, you can include an optional front matter section to provide additional metadata for the article.

This section is enclosed within --- at the beginning of the content and can contain fields such as title, published, tags, date, series, canonical_url, and cover_image.
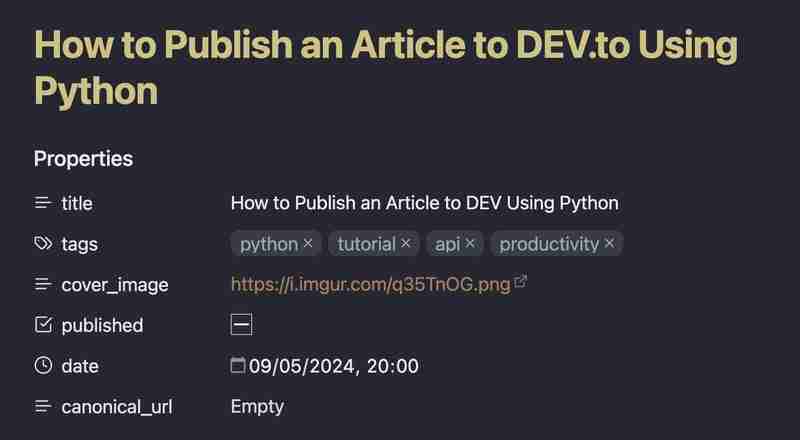
If you’re using a markdown editor like Obsidian, you can quickly insert these properties by using Cmd/Ctrl+; to add a property to a note.
Here’s a snapshot of the properties setup in my Obsidian:

Automating the process of publishing articles to DEV using Python can be a game-changer, particularly if you are posting multiple articles or managing content for a team. The DEV API is straightforward and makes integration into your existing workflows easy.
With this setup, you’re ready to start automating your article publishing on DEV. Happy coding!

Thank you for taking the time to explore data-related insights with me. I appreciate your engagement.
? Connect with me on LinkedIn

The above is the detailed content of How to Publish an Article to DEV Using Python. For more information, please follow other related articles on the PHP Chinese website!


