


Finding all the Jet Kordo’s Legacy Vault locations scattered around Star Wars Outlaws will yield three pieces of the Scoundrel Set. Finding each can be a bit of a trick, especially having to rely on the beeping noise to pick them up.
There are a total of six vaults to find across the various planets in Star Wars Outlaws. Each one will yield a few rewards, and three of them contain the Scoundrel Gear set. Here is where you can find them all.
To start the quest, you simply have to pick up the HoloTracker from the Trailblazer. As soon as you grab this from your ship, the Jet Kordo Legacy quest will begin, and you need to make your way to the first vault.
This quest will send you to the first rock of many. This rock will activate your Holotracker and lead you to the first of six vaults. The beeping can, in some situations, be helpful. Through a higher tone and faster beep, it will signal when you’re facing the right direction. However, it’s not always that reliable since you won’t always be looking the right way as you get closer to the mark.
The first vault is on Toshara, where you need to approach the first rock which is found south of Typhon’s Rock. It is a very simple one to find: Head past the rock and down the rock path. Keep walking past the rock on the path to its left, and make your way to the pit in the ground full of red rocks.
In this pit, you will see an arched passageway to walk through. Head through this and drop down into the second pit that opens up on your right.
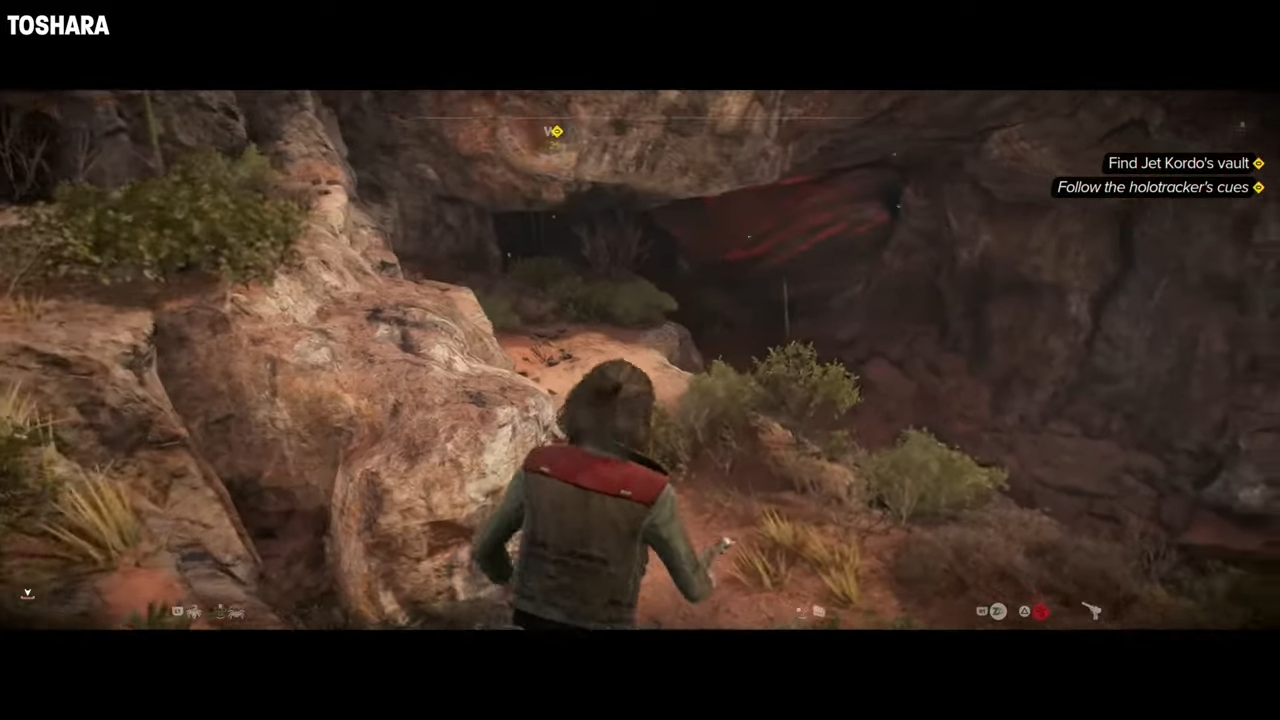
In this pit, you will find an overhanging rock leading to a cave. On the left of the entrance to the cave, you will find a spot to enter the Holotracker. Interacting with this will drop down a ladder in front of you. This is the entrance to the first of the Jet Kordo’s Legacy vaults in Star Wars Outlaws.
This first vault will contain a bunch of resources and treasure for you to collect. The main event is in a chest, which will reward you with the Scoundrel Belt and Jet Kordo’s Legacy part 2, and it’s time to move on to the next location.
The next vault can be found by heading to Akiva and dropping into Myrra Market District. Here, you will need to look for a shady merchant selling the next holodisk needed for the Jet Kordo’s Legacy mission in Star Wars Outlaws. He won’t be hard to find and is marked with a yellow symbol. Pick up the holodisk from the merchant’s inventory and move on to the next stage.
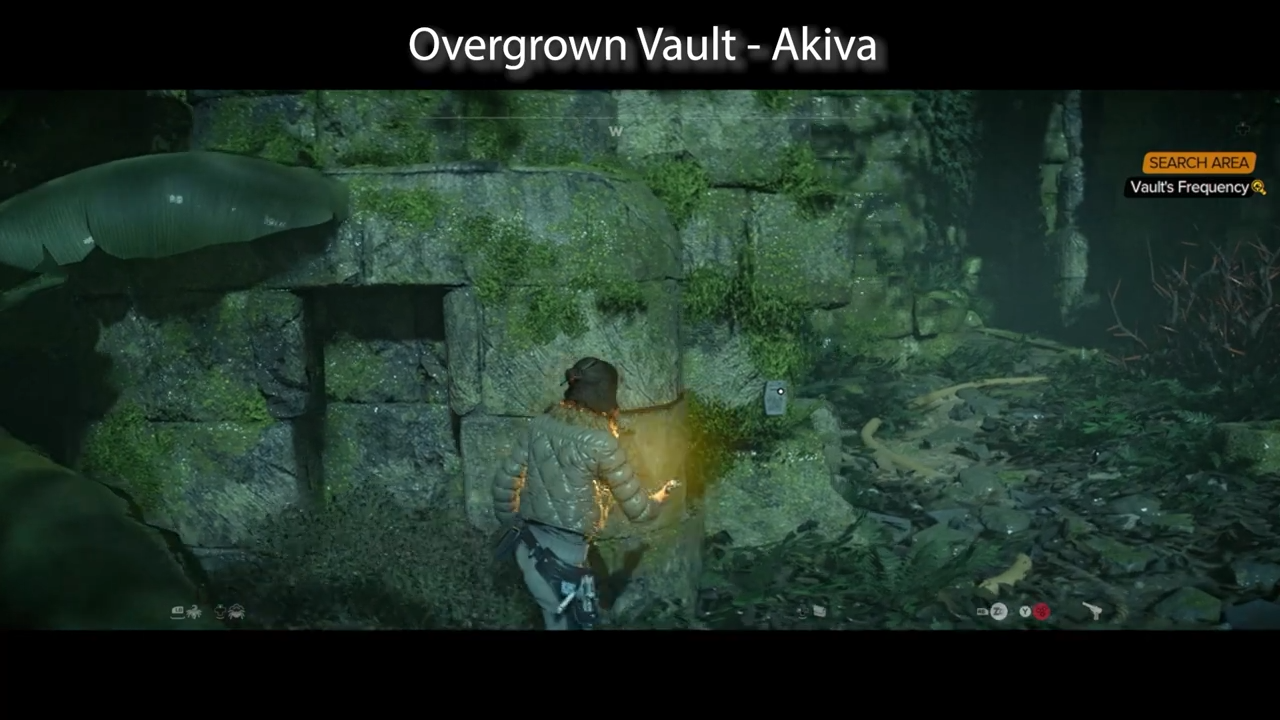
Now, go to the Myrra Valley just south of the Delma Water Tower. You can bring up the Holotracker here by pressing the left button on the D-Pad and the Circle button. This will lead you to the rock that will tune the Holotracker to the right frequency.
Head over the fallen log bridge and run along the wall to the northeast, following the path. This will eventually lead you to the rock you need to continue the quest for the Overgrown Vault. Look for the location against the wall and tune the Holotracker.
이제 추적기를 이용하여 왔던 길을 되돌아갔다가 쓰러진 통나무 다리를 건너 돌아옵니다. 내려갈 수 있는 지역에 도달할 때까지 계속 동쪽으로 향하세요. 이렇게 하면 무성한 폐허로 이어질 것이며, 그 중앙에 홀로디스크를 삽입할 지점을 찾을 수 있습니다.
이렇게 하면 바로 옆에 다음 Jet Kordo의 레거시 금고가 열립니다. 내부로 들어가 Blaster Recirculator 및 Jet Kordo의 레거시 파트 4와 함께 일부 자원과 전리품을 얻으세요.
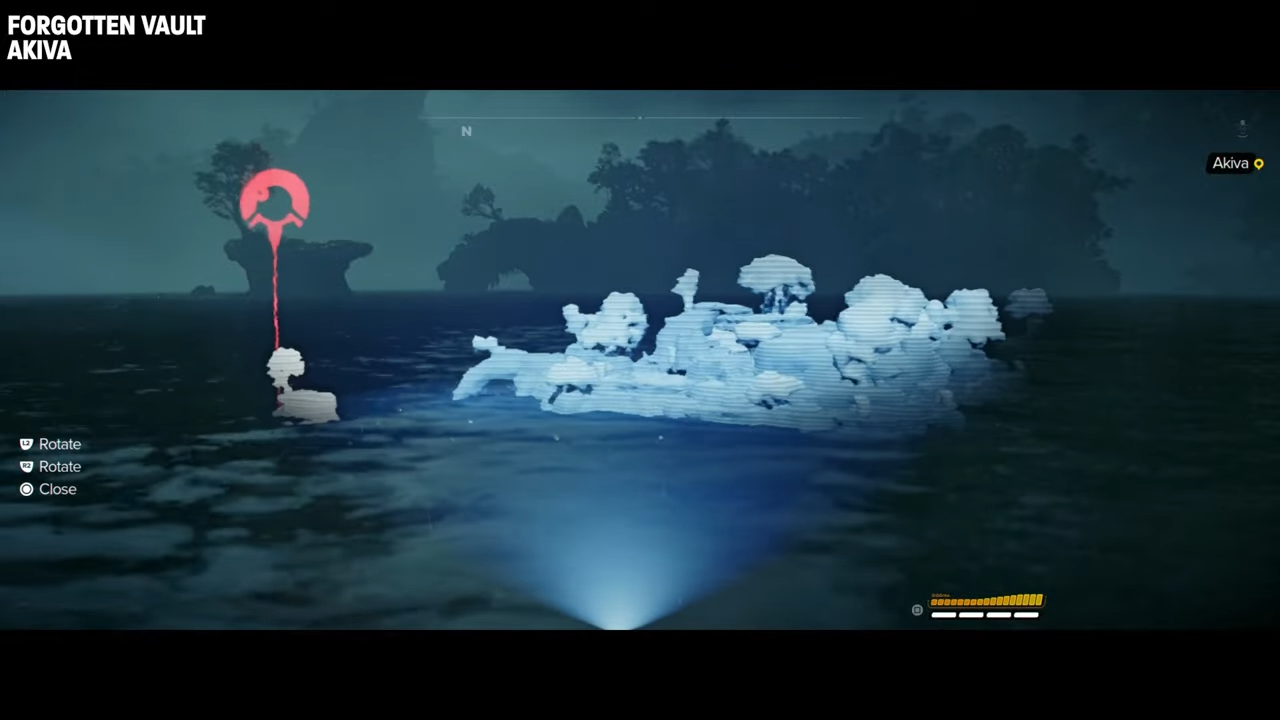
이 금고는 Akiva에도 있으므로 비행기를 타기 전에 다시 돌아가세요. 미라 마을. 지도의 남동쪽에는 Betrayed라는 노란색 마커가 있습니다. 이것을 집으면 홀로디스크의 위치를 엿들을 수 있습니다.
Jet Kordo의 레거시 임무의 다음 단계에서는 Akiva의 Hutt 지역으로 이동하게 됩니다. 그곳에서 노란색 기호로 표시된 홀로디스크를 볼 수 있습니다. 지도에서. Nix는 NPC에게서 아이템을 훔쳐야 합니다. 바라건대, 당신은 이 그룹과 좋은 관계를 유지하고 있습니다. 그렇지 않으면 약간의 싸움/은밀한 행동을 해야 할 수도 있습니다. 도난당한 홀로디스크를 집으세요.
위치스 핑거스 바로 서쪽 호수로 가서 홀로트래커를 불러와 위치를 디스크와 일치시키세요. 당신이 가야 할 바위가 어디에 있는지 알려줄 것입니다. 꼭대기에 나무가 있는 하나의 높은 섬이 보일 것입니다. 여기로 가서 이 높은 섬 바로 왼쪽에 있는 바위를 찾으세요.
홀로트래커의 주파수를 조정한 후 호수를 건너 북쪽으로 가면 먼 쪽에 있는 작은 만이 나올 때까지 가세요. 서쪽으로 방향을 틀고 스피더를 타고 해변을 지나 동굴로 점프하세요. 여기서는 홀로디스크로 열 수 있는 빨간 문을 찾을 수 있습니다.
이 방에는 Jet Kordo의 레거시 퀘스트에 필요한 일부 전리품과 다음 금고 상자가 들어 있습니다. 그러나 열려고 하면 알람이 울립니다. Nix를 사용하여 바로 아래에 있는 버튼을 사용하여 끄세요. Scoundrel Pants와 Jet Kordo's Legacy, Part 4를 받게 됩니다.
다음 위치는 Tatooine에서 끝까지 이어집니다. 다음 홀로디스크를 위해 정보를 수집해야 합니다. 이것은 Tatooine 주변의 여러 위치에서 얻을 수 있지만 Mos Eisley에 있는 Chalmun's Cantina 바로 바깥에서 발견했습니다. 아무도 없으면 다른 인구 밀집 지역으로 가서 노란색 마커를 찾으세요.
첫 번째 정보를 얻은 후에는 작은 마을에서 다음 조각을 찾아야 합니다. 더 남쪽으로 Wayfar라고 불립니다. 여기에서 퀘스트의 다음 단계를 받기 위해 뇌물이 필요한 두 사람을 만나게 됩니다.
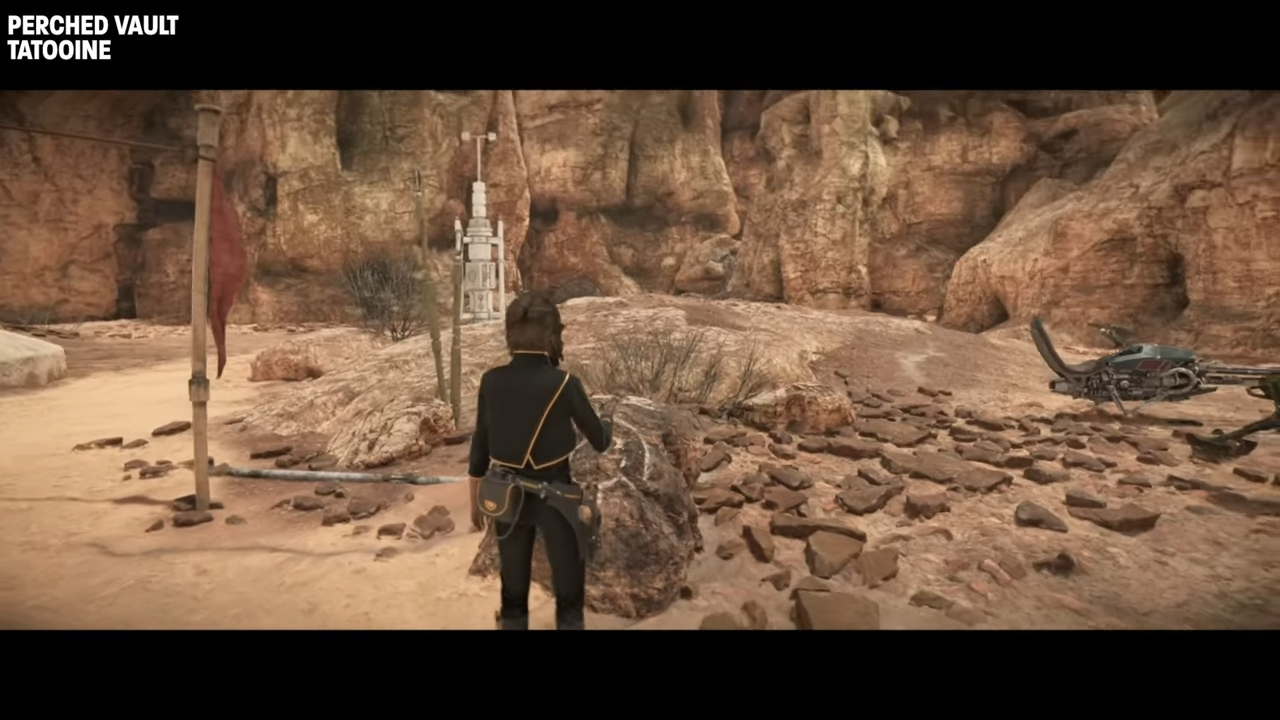
지도 북쪽에는 기둥 숲이라는 위치가 있습니다. 이곳의 서쪽으로 가면 암벽에 박혀 있는 동굴을 찾을 수 있다. 이 동굴에서는 다음 홀로디스크를 집게 됩니다. 그러면 광활한 사막 한가운데에 있는 모스 알고의 바로 서쪽에 있는 필요한 위치로 연결될 것입니다.
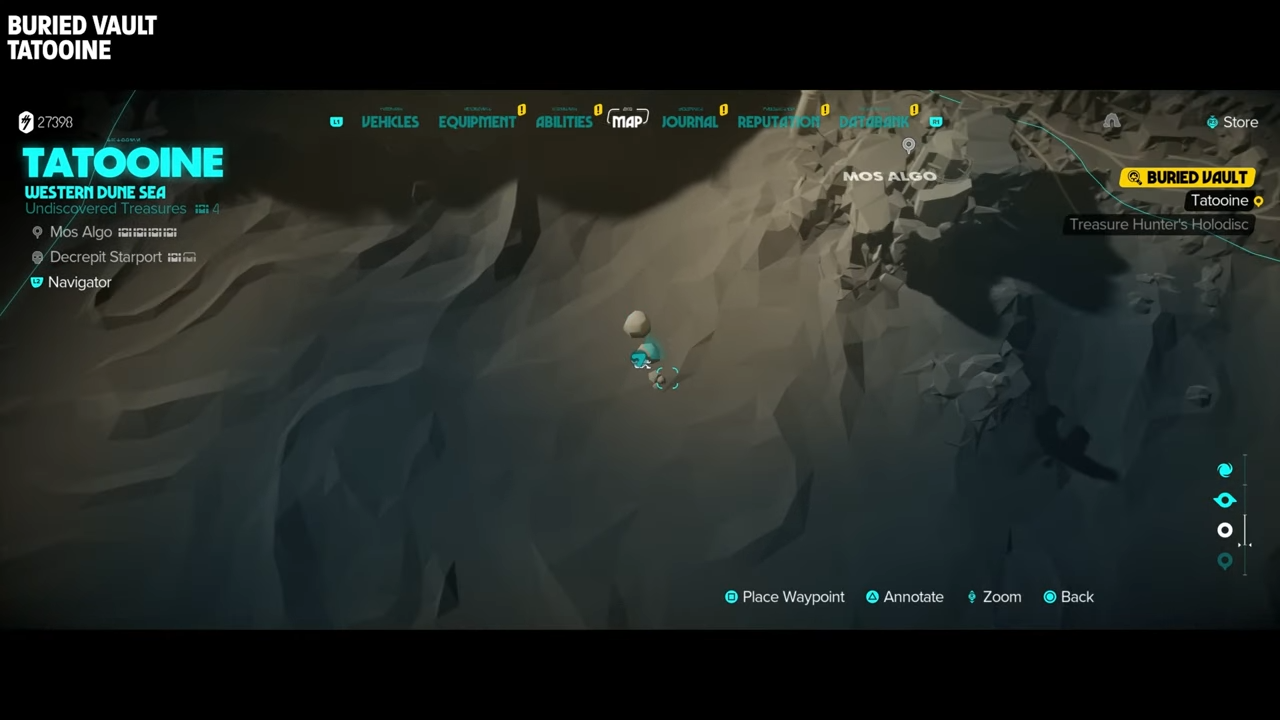
3개의 바위가 위치를 표시합니다. 트리오 중 남쪽에 있는 가장 작은 바위는 Buried Vault 위치에 대한 빈도를 얻기 위해 사용해야 하는 바위입니다. 퀘스트의 다음 단계를 시작하려면 상호작용하세요.
Dies ist aufgrund der Offenheit der Wüste ein sehr einfaches Gewölbe. Gehen Sie einfach nach Südwesten durch die Wüste und Sie werden schließlich zu dem im Sand vergrabenen Gewölbe gelangen. Benutze die Holodisk, um eine Luke zu öffnen. Sie müssen es mit einem Ionenstrahler sprengen. Gehen Sie durch die neu geöffnete Tür, um Ihre Beute zu erhalten, darunter Jet Kordo's Legacy Teil 5, die Scoundrel-Jacke und den X-FP-C28-Schiffscomputer.
Der nächste Tresor In der Quest „Kordos Vermächtnis“ findet die Quest wiederum auf Tatooine statt. Machen Sie sich zunächst auf den Weg in die Stadt Bestine. Sie werden die Leute, mit denen Sie für Informationen sprechen müssen, irgendwo in der Stadt finden, aber ich habe sie in der Nähe des Hafens gefunden. Auch hier können sie überall auftauchen. Gehen Sie also einfach umher, bis Sie die Aufforderung zum Sprechen sehen.
Begib dich zur Garrick Ranch, die durch die Informationen gekennzeichnet ist, die du gesammelt hast. Hier kann es zu einem kleinen Kampf kommen, aber sobald dieser aus dem Weg ist, öffnen Sie die Tür links mit dem Minispiel. In diesem neu freigeschalteten Raum finden Sie den nächsten Schritt in der Legacy-Quest für das Throngewölbe.
Sie werden zum Speeder-Händler Tretet Zadiket in den South Jundland Wastes geführt. Hier finden Sie den Frequenzisolationsstein, den Sie zur Aktivierung des Holotrackers benötigen. Gehen Sie direkt am Felsen vorbei und nehmen Sie den Weg links, der durch die Felswand führt.
Von hier aus folgen Sie dem Pfad weiter und springen dabei über mehrere Felsvorsprünge und Lücken. Schließlich erreichen Sie eine große weiße kletterbare Wand, die Sie zum Perched Ledge-Gewölbe führt. Aktivieren Sie die rote Tür mit Ihrer Holodisk und treten Sie ein, um Ihre Beute zu erhalten.
Dieser vorletzte Tresorraum wird Ihnen eine Sandcrawler-Lackierung für Ihren Speeder und Jet Kordo's Legacy Teil 7 bescheren.
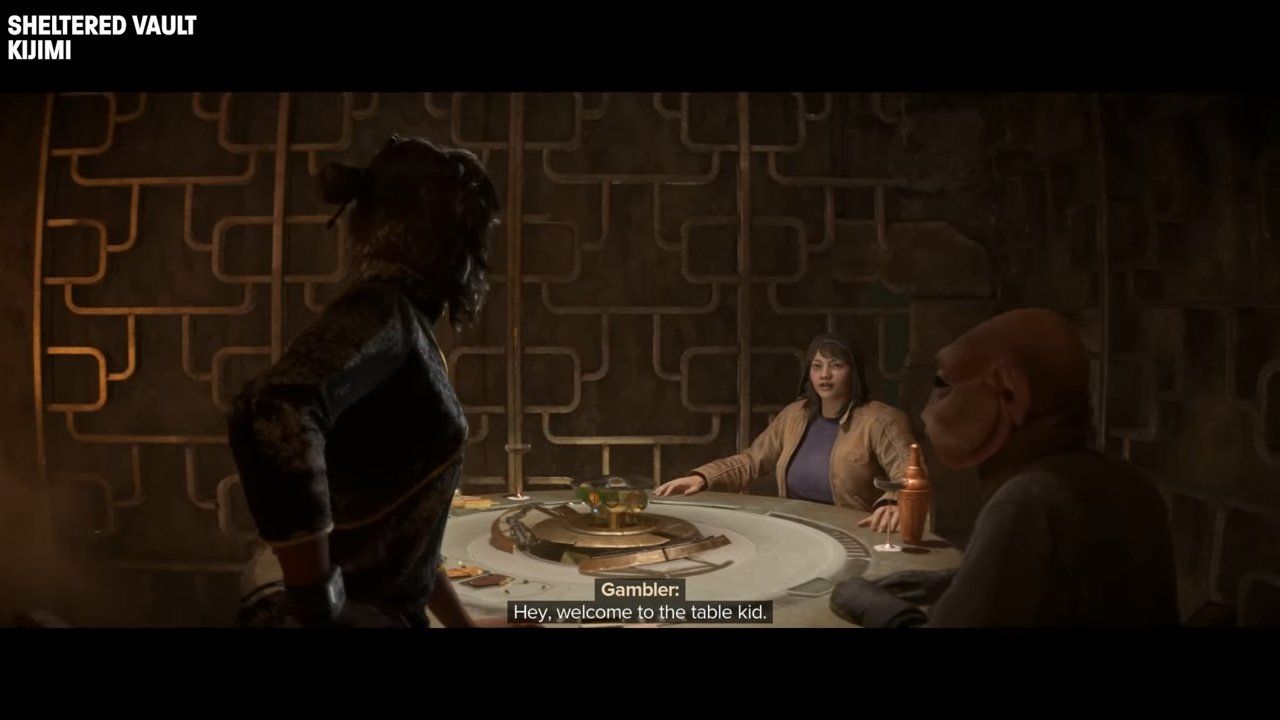
Der letzte Tresor in der Quest „Jet Kordos Vermächtnis“ befindet sich in Kijimi. Um die ersten Informationen zu erhalten, müssen Sie in die Stadt Kijimi fahren und sich auf den Weg zur kleinen Brücke im Osten der Stadt neben dem Thermalviertel machen. Sie erhalten einige Informationen, die Sie zum Diebesviertel führen. Begib dich in die Spielhölle, in der du eine Partie Sabacc gewinnen musst, um weitere Informationen zur Quest zu erhalten.
Sobald Sie die Holodisk gewonnen haben, verlassen Sie das Gebäude, in dem Sie gespielt haben, und gehen Sie nach links auf den Platz vor Ihnen. Auf der anderen Seite des Platzes finden Sie den Stein, mit dem Sie interagieren müssen, um den Holotracker zu aktivieren.
Gehen Sie zurück zum Eingang der Spielhalle und gehen Sie mit dieser auf Ihrer rechten Seite den Weg bis zum Ende entlang. Sie werden wissen, dass Sie die richtige Stelle erreicht haben, wenn Sie auf eine Gruppe geparkter Speeder stoßen. Auf diesem Platz gibt es am Ende rechts einen offenen Durchgang. Gehen Sie hindurch, bis Sie ein Quadrat mit erklimmbaren gelben Haltegriffen in der Wand erreichen.
Erklimmen Sie diese und dann zwei Treppenstufen, um die Stelle zu finden, die Sie zum Betreten der Holodisk benötigen. Dadurch wird die Tresortür geöffnet, eine Treppe tiefer. Sammeln Sie Dai Bendu Maps, Jet Kordo’s Legacy Teil 6 und das Direct Transaction-Sammlerstück. ABER WARTEN SIE, das ist noch nicht das Ende. Sie müssen einen weiteren Schritt abschließen.
Bevor Sie den ganzen Weg zurück nach Toshara reisen, holen Sie die letzte Holodisk von Ihrem Schiff ab. Jetzt können Sie zum ersten Tresor zurückkehren, den Sie besucht haben. Betreten Sie den Tresorraum und aktivieren Sie die letzte Tür direkt vor Ihnen, wenn Sie die Leiter hinaufsteigen.
Cela terminera les étapes de la quête Jet Kordo's Legacy et vous récompensera avec un charme majeur de parapluie cocktail et la dernière partie de Jet Kordo's Legacy. Vous êtes maintenant prêt pour davantage d’aventures, mais quelle est la prochaine étape ?
The above is the detailed content of Star Wars Outlaws Jet Kordo's Legacy mission guide: Full walkthrough of all locations and planets. For more information, please follow other related articles on the PHP Chinese website!
 The difference between win10 home version and professional version
 What is system software
 The latest ranking of Snapdragon processors
 What are the life cycles of vue3
 How to solve the problem that this copy of windows is not genuine
 Activate qq number
 How to learn C# from scratch
 Why does the computer automatically restart?


![[Web front-end] Node.js quick start](https://img.php.cn/upload/course/000/000/067/662b5d34ba7c0227.png)


