XAMPP is a software package that enables users to create a local web development environment on their computers. It includes the Apache web server, MySQL database, PHP scripting language, and Perl programming language. XAMPP simplifies the process of setting up a web server for testing and developing web applications, allowing users to work on their projects offline. It is widely used by developers to prototype and debug websites or web applications before deploying them to a live server.
A database is a structured collection of data organized and stored in a computer system. It serves as a central repository for storing and managing large amounts of information in a structured manner, making it easy to retrieve, manipulate, and analyse data. Databases are used in various applications and industries to store data such as customer information, product details, financial records, and much more. They provide a structured way to store data in tables, with each table consisting of rows and columns. Databases use a query language, such as SQL (Structured Query Language), to perform operations like creating, reading, updating, and deleting data.
Follow the steps to fetch the data from the server
Launch the XAMPP: To open the XAMPP server follow the steps below
Step 1: Start the XAMPP Server
Launch the XAMPP control panel.
Start the Apache and MySQL services by clicking on the "Start" button next to each service.

Step 2: Access phpMyAdmin
Open your web browser and go to http://localhost/phpmyadmin.
phpMyAdmin is a web-based application used to manage MySQL databases.

Create the database: First create the database and then create the table in MySQL with the following steps.
Step 1: Create a Database
In phpMyAdmin, click on the "Databases" tab.
Enter a name for your database in the "Create database" field.
Click on the "Create" button to create the database.
Here I have created the database with the “Assignments.

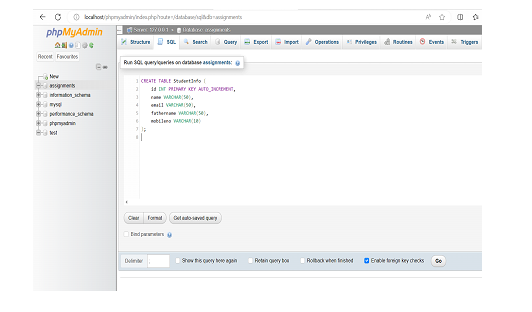
Step 2: Create a Table
Select the newly created database from the left-hand sidebar.
Click on the "SQL" tab.
Enter the following SQL query to create a table:

Here I have created the table with the name StudentInfo.
Click on the GO button to execute the query and create the table.
Following is the script to create the table.
Script to create table:
CREATE TABLE StudentInfo (
   id INT PRIMARY KEY AUTO_INCREMENT,
   name VARCHAR(50),
   email VARCHAR(50),
   fathername VARCHAR(50),
   mobileno VARCHAR(10)
);
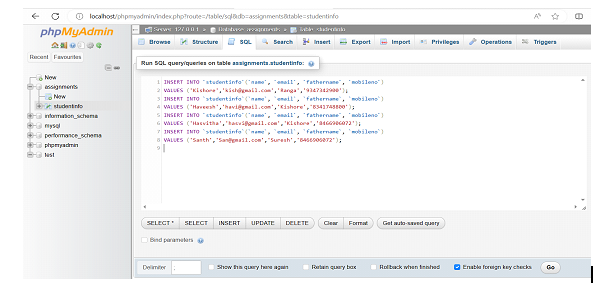
Step 3: Insert data into the Table
Select the newly created database from the left-hand sidebar.
Click on the "SQL" tab.
Enter the following SQL query to insert data into the table:

INSERT INTO `studentinfo`(`name`, `email`, `fathername`, `mobileno`)
VALUES ('Kishore','kish@gmail.com','Ranga','9347342900');

INSERT INTO `studentinfo`(`name`, `email`, `fathername`, `mobileno`)
VALUES ('Haveesh','havi@gmail.com','Kishore','8341748800');

INSERT INTO `studentinfo`(`name`, `email`, `fathername`, `mobileno`)
VALUES ('Hasvitha','hasvi@gmail.com','Kishore','8466906072');

INSERT INTO `studentinfo`(`name`, `email`, `fathername`, `mobileno`)
VALUES ('Santh','San@gmail.com','Suresh','8466906072');
Create the PHP file: In the next step we need to create the PHP file to fetch the data from the localhost server database and display the records with the following steps.
Step 1: Open any one IDE to write the PHP code. Here I used IntelliJ IDEA to write the PHP code.
Launch the IntelliJ IDEA IDE and create a folder where you want to create the program.
Now Go to File -> New -> File.
Give the name of the file with .PHP as an extension, here I create the file name Fetch.php.
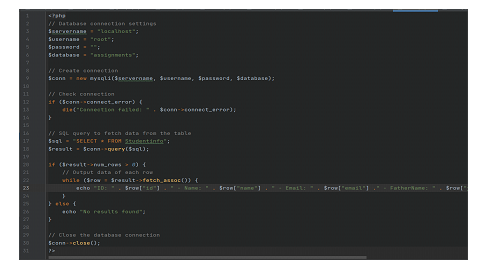
Here I entered the following code in the newly created PHP file.

Modify the database connection settings ($servername, $username, $password) according to your XAMPP configuration.
Change the database name and the table name from where you need to fetch the data.
Here I have created the database with the name “assignments”.
Make sure you add the correct server details
<?php
// Database connection settings
$servername = "localhost";
$username = "root";
$password = "";
$database = "assignments";

// Create connection
$conn = new mysqli($servername, $username, $password, $database);

// Check connection
if ($conn->connect_error) {
   die("Connection failed: " . $conn->connect_error);
}

// SQL query to fetch data from the table
$sql = "SELECT * FROM Studentinfo";
$result = $conn->query($sql);

if ($result->num_rows > 0) {
   // Output data of each row
   while ($row = $result->fetch_assoc()) {
      echo "ID: " . $row["id"] . " - Name: " . $row["name"] . " - Email: " . $row["email"] ." - FatherName: " . $row["fathername"] ." - MobileNo: " . $row["mobileno"] . "<br>";
   }
} else {
   echo "No results found";
}

// Close the database connection
$conn->close();
?>
Save the file and then, access the PHP file through your web browser (e.g., http://localhost/fetch.php) to see the fetched data from the database displayed on the page.
ID: 1 - Name: Kishore - Email: kish@gmail.com - FatherName: Ranga - MobileNo: 9347342900
ID: 2 - Name: Haveesh - Email: havi@gmail.com - FatherName: Kishore - MobileNo: 8341748800
ID: 3 - Name: Hasvitha - Email: hasvi@gmail.com - FatherName: Kishore - MobileNo: 8466906072
ID: 4 - Name: Santh - Email: San@gmail.com - FatherName: Suresh - MobileNo: 8466906072
To fetch data from a localhost server database using XAMPP, you can create a PHP program. Start by installing XAMPP and launching the Apache and MySQL services. Access phpMyAdmin to create a database and table. Then, create a PHP file in the appropriate directory and establish a connection to the MySQL database using the provided credentials. Execute an SQL query to fetch the desired data from the table and iterate through the results to display them. Finally, close the database connection. By accessing the PHP file through a web browser, you can see the fetched data displayed on the page. This process enables you to interact with the local server database using PHP and XAMPP, facilitating efficient data retrieval and utilization.
The above is the detailed content of PHP program to Fetch Data from Localhost Server Database using XAMPP. For more information, please follow other related articles on the PHP Chinese website!


