

 System Tutorial
Windows Series
How to set the default gateway on Win10 computer_Where to set the default gateway on Win10 computer
System Tutorial
Windows Series
How to set the default gateway on Win10 computer_Where to set the default gateway on Win10 computer
How to set the default gateway on Win10 computer_Where to set the default gateway on Win10 computer

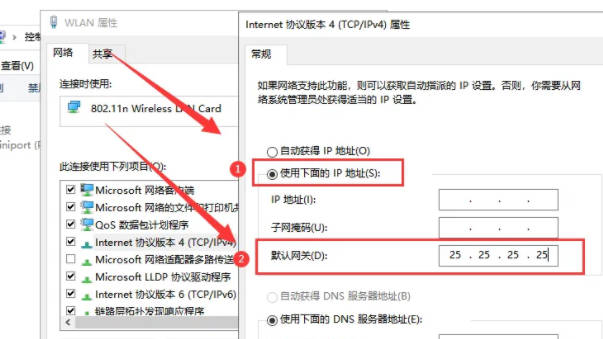
php editor Xinyi will introduce to you how to set the default gateway on Win10 computers. When using a Win10 computer, it is very important to set the default gateway. It can help you better connect to the network and ensure a smooth network. In Windows 10, setting the default gateway is very simple, just follow specific steps. Next, let us learn where to set the default gateway on Win10 computers to make the network connection more stable and smooth.
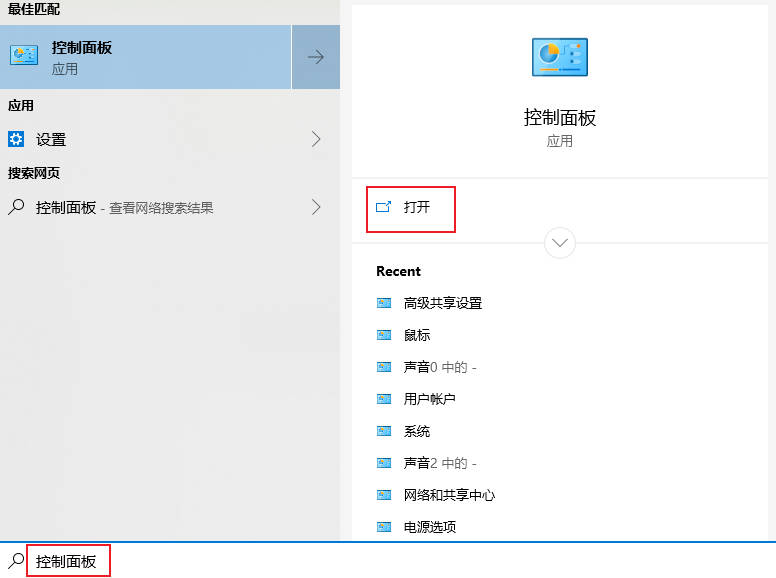
1. Click the "Search" button in the lower left corner of the computer, search for "Control Panel" and click "Open".
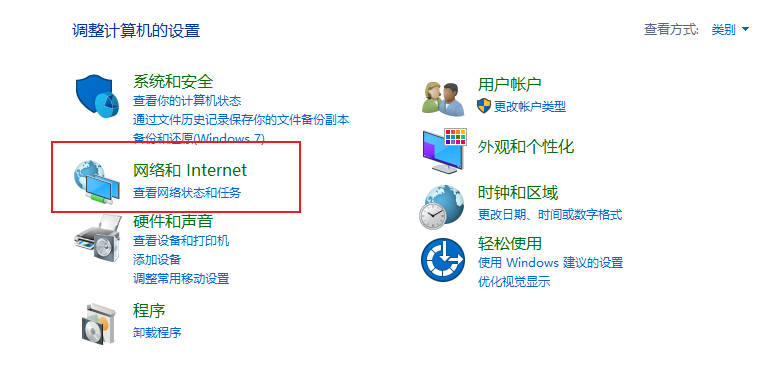
#2. Open Network and Internet in the pop-up window, and then click "Network and Sharing Center". In the upper left corner of the page, click "Change Adapter Settings"


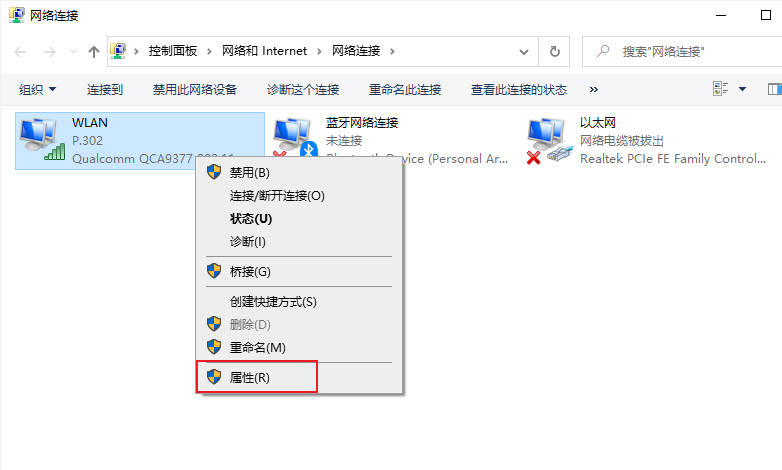
3. Right-click "WLAN", select "Properties" in the pop-up menu. Double-click to open the "Internet Protocol Version (TCP/IPv4) Properties".
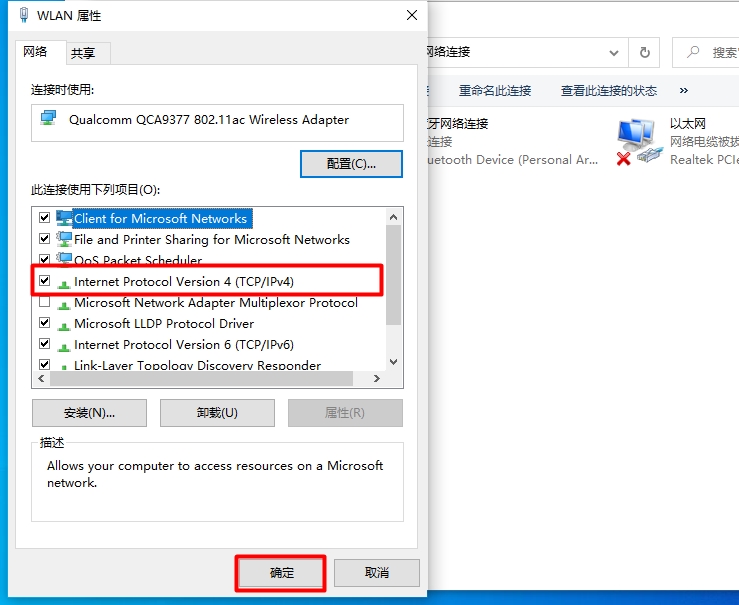
4. Check "Use the following IP address", enter the URL in "Default Gateway", and click "OK". The computer's default gateway is set.
The above is the detailed content of How to set the default gateway on Win10 computer_Where to set the default gateway on Win10 computer. For more information, please follow other related articles on the PHP Chinese website!

Hot AI Tools

Undress AI Tool
Undress images for free

Undresser.AI Undress
AI-powered app for creating realistic nude photos

AI Clothes Remover
Online AI tool for removing clothes from photos.

ArtGPT
AI image generator for creative art from text prompts.

Stock Market GPT
AI powered investment research for smarter decisions

Hot Article
Hot Tools

Notepad++7.3.1
Easy-to-use and free code editor

SublimeText3 Chinese version
Chinese version, very easy to use

Zend Studio 13.0.1
Powerful PHP integrated development environment

Dreamweaver CS6
Visual web development tools

SublimeText3 Mac version
God-level code editing software (SublimeText3)

 What is the difference between sleep and sleep in win10? Detailed explanation of the functional differences between sleep and sleep mode in win10 system?
Sep 20, 2025 am 11:48 AM
What is the difference between sleep and sleep in win10? Detailed explanation of the functional differences between sleep and sleep mode in win10 system?
Sep 20, 2025 am 11:48 AM
Sleep mode realizes rapid recovery by keeping memory powered, suitable for short-term departure; Sleep mode saves data to the hard disk and completely powered off, suitable for long-term deactivation and prevents data loss; mixed sleep combines the advantages of both, taking into account speed and security.
 What is the problem that win10 cannot join the home group_File sharing alternative after Win10 home group feature has been removed
Sep 24, 2025 pm 05:33 PM
What is the problem that win10 cannot join the home group_File sharing alternative after Win10 home group feature has been removed
Sep 24, 2025 pm 05:33 PM
After Windows 10 version 1803, the home group function was removed, and file sharing needs to be achieved by enabling network discovery, configuring system services and registry modification. First, confirm the system version and check whether the home group options are missing; then enable network discovery and file printer sharing in "Network and Sharing Center" and turn off password protection; then start key services such as FunctionDiscoveryResourcePublication in the service manager, and adjust the MachineKeys folder permissions if necessary; then set AllowInsecureGuestAuth to 1 through the registry editor to support unsafe guest authentication; finally use File Explorer to share files directly
 How to clear clipboard history in win10 How to clear clipboard history in win10 How to clear clipboard history in win10
Sep 20, 2025 pm 12:15 PM
How to clear clipboard history in win10 How to clear clipboard history in win10 How to clear clipboard history in win10
Sep 20, 2025 pm 12:15 PM
First, clear the clipboard history through system settings, enter "Settings-System-Clipboard" and click the "Clear" button; secondly, you can enter cmd/c "echooff|clip" to quickly clear it; finally, you can manually open the Win V panel to delete specific entries.
 There is a problem with the license of this app in win10_Fix the error that the app prompted 'The license of this app is a problem'
Sep 20, 2025 pm 12:18 PM
There is a problem with the license of this app in win10_Fix the error that the app prompted 'The license of this app is a problem'
Sep 20, 2025 pm 12:18 PM
First, restart the ClipSVC service, reset the license data file if it is invalid, and finally reinstall the application through PowerShell to resolve the "There is a problem with the license for this application" error.
 How to create a guest account in win10? Steps to create a guest account in win10 system
Sep 20, 2025 pm 12:24 PM
How to create a guest account in win10? Steps to create a guest account in win10 system
Sep 20, 2025 pm 12:24 PM
You can enable the Guest account through computer management and cancel the disable; 2. Professional version users can use the Group Policy Editor to enable the guest account status; 3. Guest denial local login restrictions need to be removed in the user permission allocation; 4. You can also use the administrator command prompt to execute netuserguest/active:yes to quickly enable it.
 What should I do if I have a black screen on win10 and only the mouse is displayed? Solution to the black screen on win10 and only the mouse is displayed.
Sep 20, 2025 pm 12:27 PM
What should I do if I have a black screen on win10 and only the mouse is displayed? Solution to the black screen on win10 and only the mouse is displayed.
Sep 20, 2025 pm 12:27 PM
1. Restart Windows Explorer to restore desktop display; 2. Enter safe mode to update or roll back the graphics card driver to solve compatibility problems; 3. Use SFC command to repair system file corruption; 4. Disable non-essential startup items and services through msconfig to eliminate conflicts; 5. Uninstall the latest update to eliminate the black screen problem introduced by the update.
 What to do if the win10 network icon keeps spinning around_When the win10 network connection icon is spinning around, the solution to the win10 network connection icon cannot access the Internet
Sep 20, 2025 pm 12:12 PM
What to do if the win10 network icon keeps spinning around_When the win10 network connection icon is spinning around, the solution to the win10 network connection icon cannot access the Internet
Sep 20, 2025 pm 12:12 PM
First, restart the network list service and check the startup type, then update or reinstall the network card driver, then reset the network settings to restore the default configuration, and finally run the system's own network troubleshooting tool to automatically fix the problem.
 This computer can't be stuck when resetting win10_Solve the problem that the system progress of Win10 resetting is stuck at a certain percentage
Sep 24, 2025 pm 05:30 PM
This computer can't be stuck when resetting win10_Solve the problem that the system progress of Win10 resetting is stuck at a certain percentage
Sep 24, 2025 pm 05:30 PM
When the reset computer is stuck, wait and observe the activity of the hard disk to confirm whether it is running; then disconnect the network to avoid update interference, or enter safe mode to eliminate software conflicts; check disk errors through chkdsk, clean the SoftwareDistribution cache to fix update problems; if it is still invalid, use Windows installation media to start the repair and perform the reset operation.
