


How to get help in Windows 11

After getting used to the interface of previous versions of Windows, it may be challenging to adapt to Windows 11. But don't worry, Windows 11 provides a wealth of help resources to help you master various functions more easily.
This article will guide you on how to use the tools that come with Windows 11 to obtain support so that you can quickly find official solutions when you encounter problems.
Method 1: Use the “Getting Started” app
Windows 11’s “Getting Started” apps are great mentors for beginners. It helps users easily complete the basic settings of the system and introduces new features concisely. Follow its guidance and you will quickly become familiar with this new operating system.
1 Click the "Start" menu, find and click the "Getting Started" app, and select "Get Started".
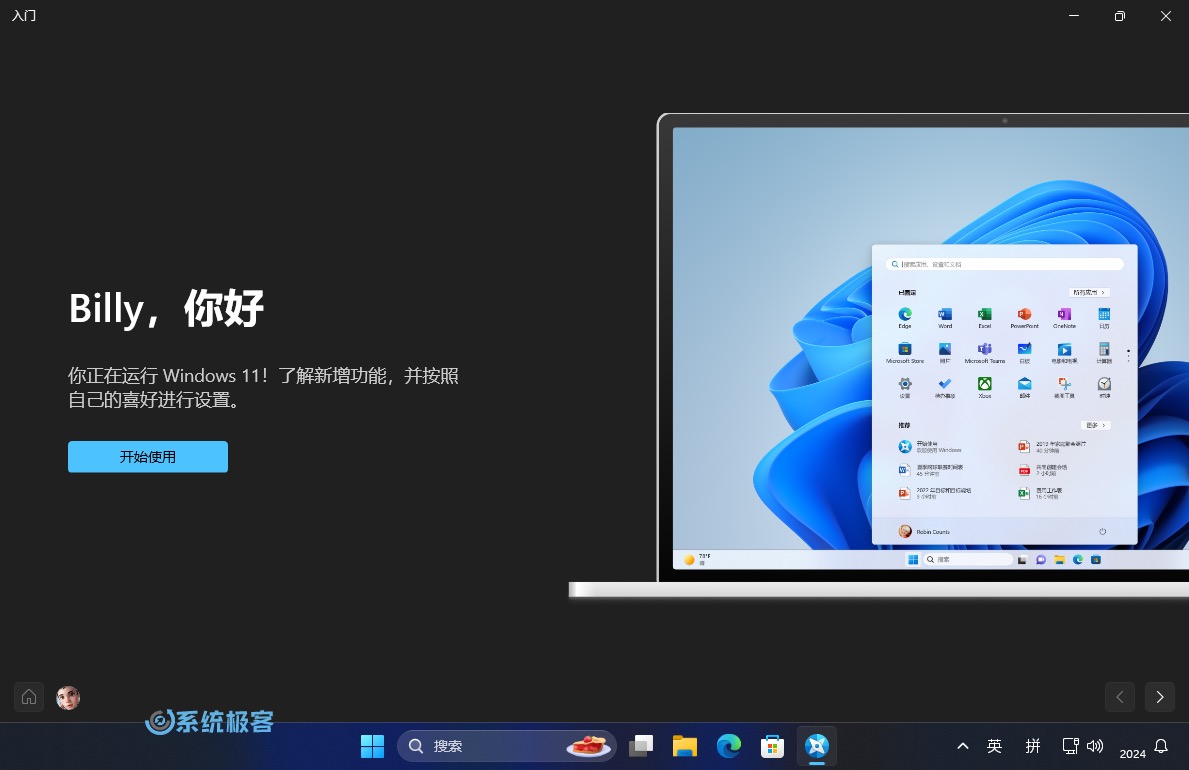 Click "Get Started"
2 Based on your usage needs and interests, such as "Games", "Creativity" or "Entertainment", select the corresponding option and follow the prompts.
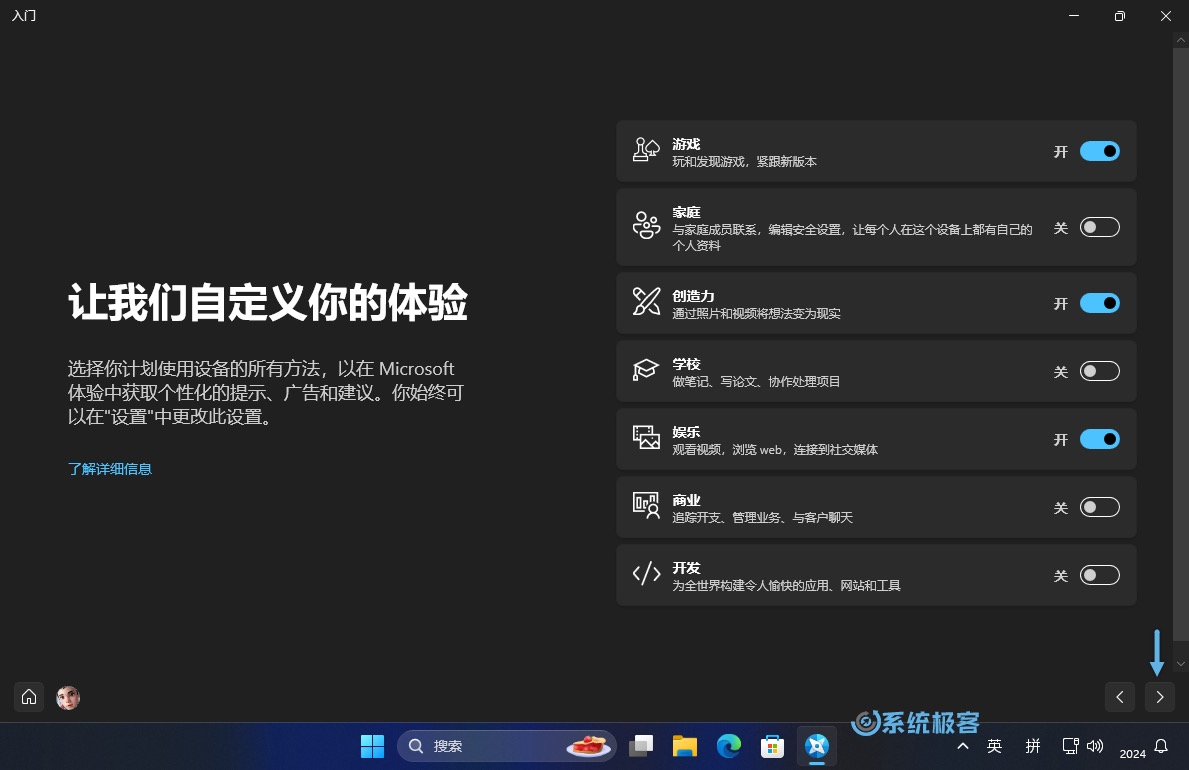 Select Windows 11 usage scenario
3 Follow the on-screen guidance to gradually understand and set up related functions of Windows 11.
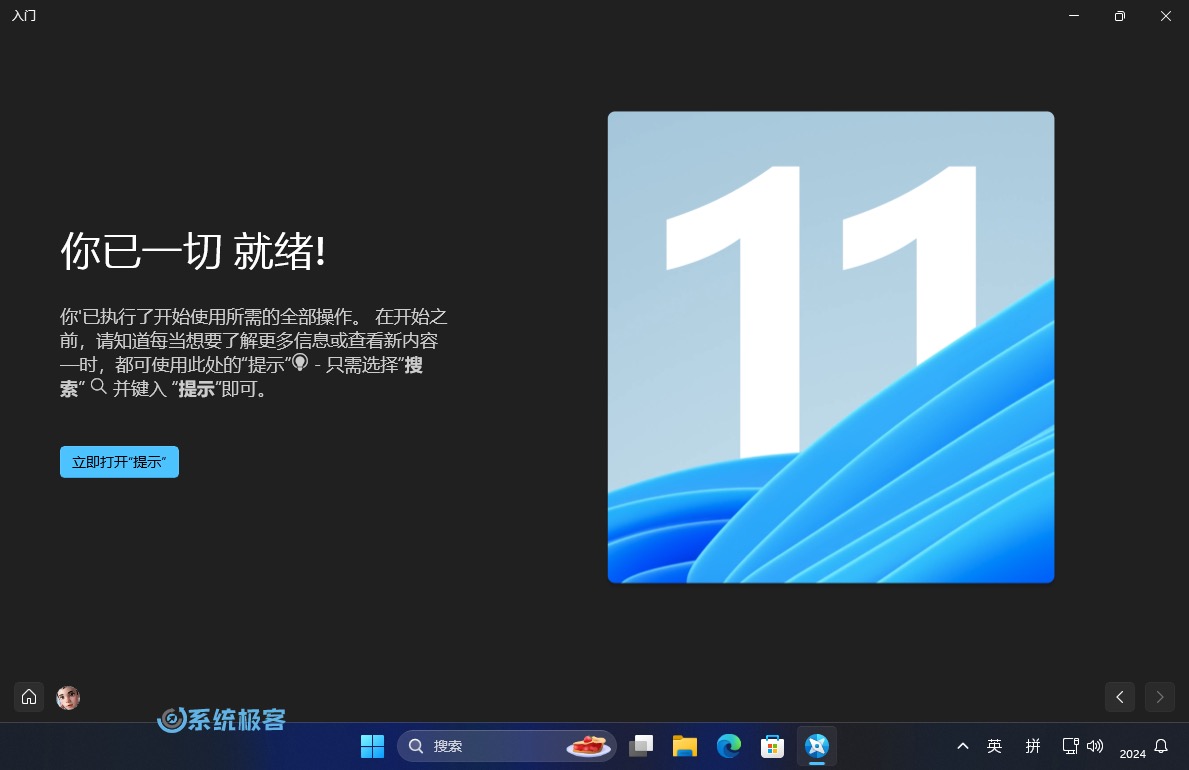 Windows 11 "Getting Started" App
4 You can also open the "Tips" app immediately to get more learning materials.
Method 2: Use the Tips app
The “Tips” app is another useful tool provided by Windows 11. Whether it is desktop settings, personalization, shortcut key usage, or security enhancement, it can provide practical information in many aspects.
1Open the "Tips" app from the "Start" menu.
2Select the topic category you are interested in.
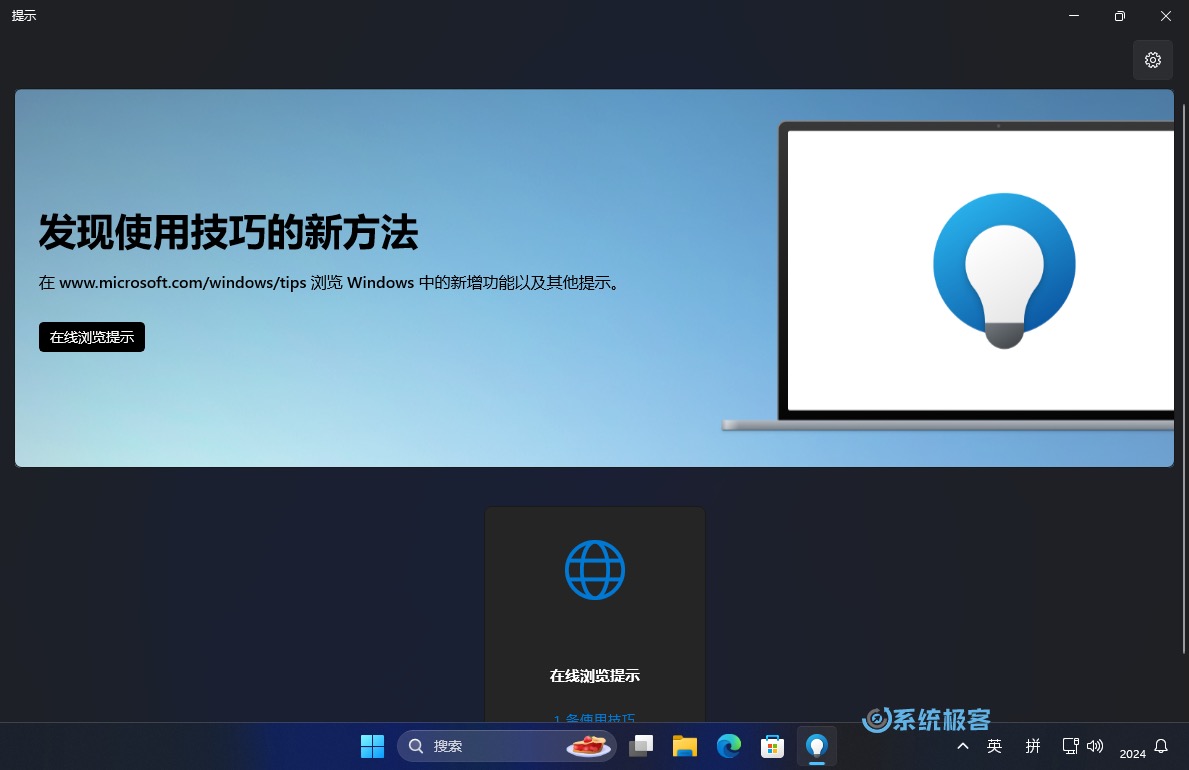 Windows 11 “Tips” App
By practicing these tips, you'll be able to master Windows 11's new features faster.
Tips" application has been redirected to the Windows 11 features & tips page.
Method 3: Use "Get Help" to solve the problem
The “Get Help” app is a built-in question-answering tool in Windows 11. It provides answers to questions, official guidance links, and you can also contact Microsoft technical support.
1Open the “Get Help” app in the “Start” menu.
2 (Optional) Sign in to your Microsoft account to contact Microsoft support directly.
3Describe your problem in the dialog box and choose the most appropriate suggested option.
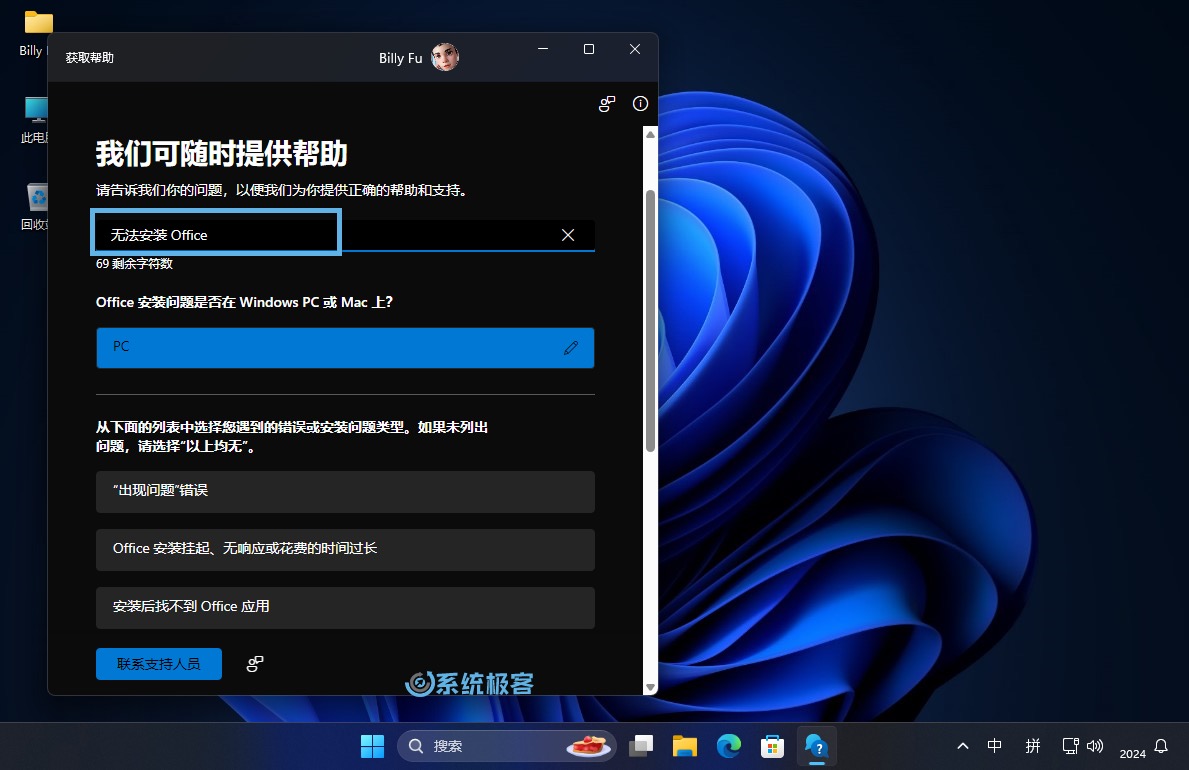 Search question
4 Read the troubleshooting guide or related answers carefully.
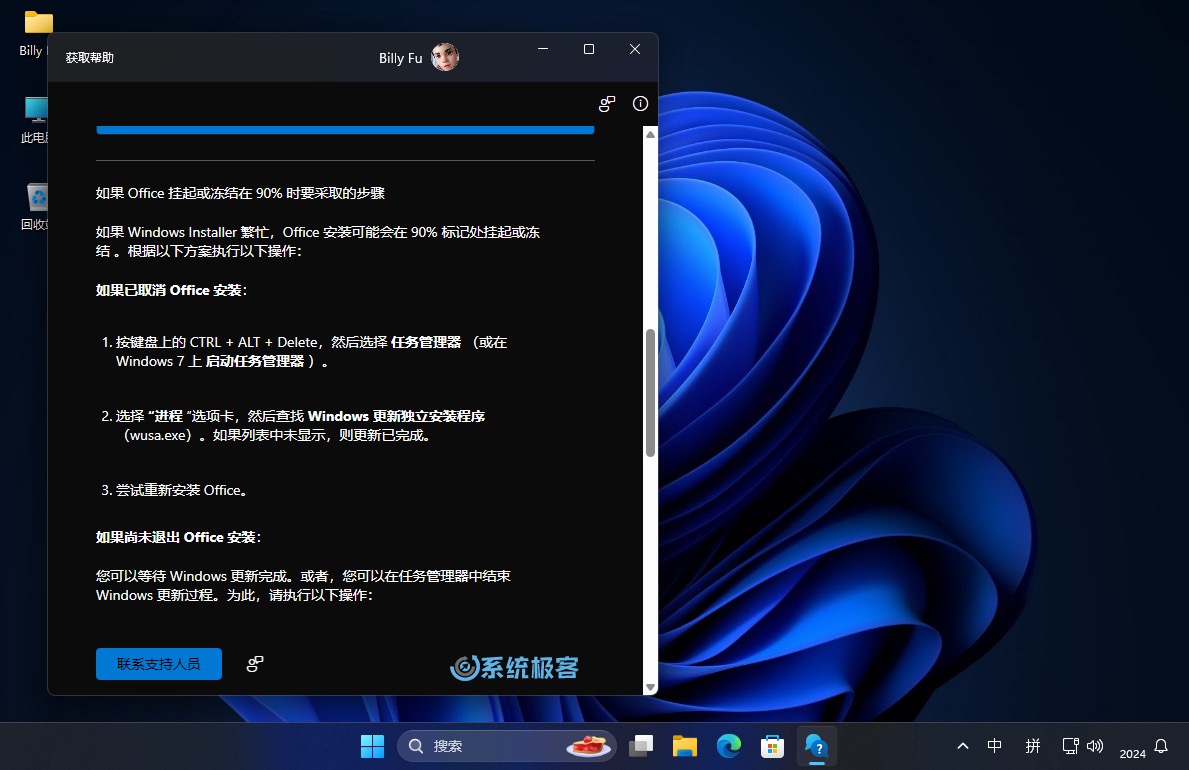 View answers to questions
5 If the problem is not resolved, you can "Contact Support" for further assistance.
Method 4: Use "Quick Assistant" for remote assistance
"Quick Assistant" is a remote assistance tool pre-installed in Windows 11. It can help others or receive help remotely. It is a good alternative to remote desktop software such as TeamViewer and AnyDesk.
When helping:
1Open "Quick Assistant" from the "Start" menu.
2 Click "Help Someone".
3 Log in to your Microsoft account and send the generated security code to those who need help.
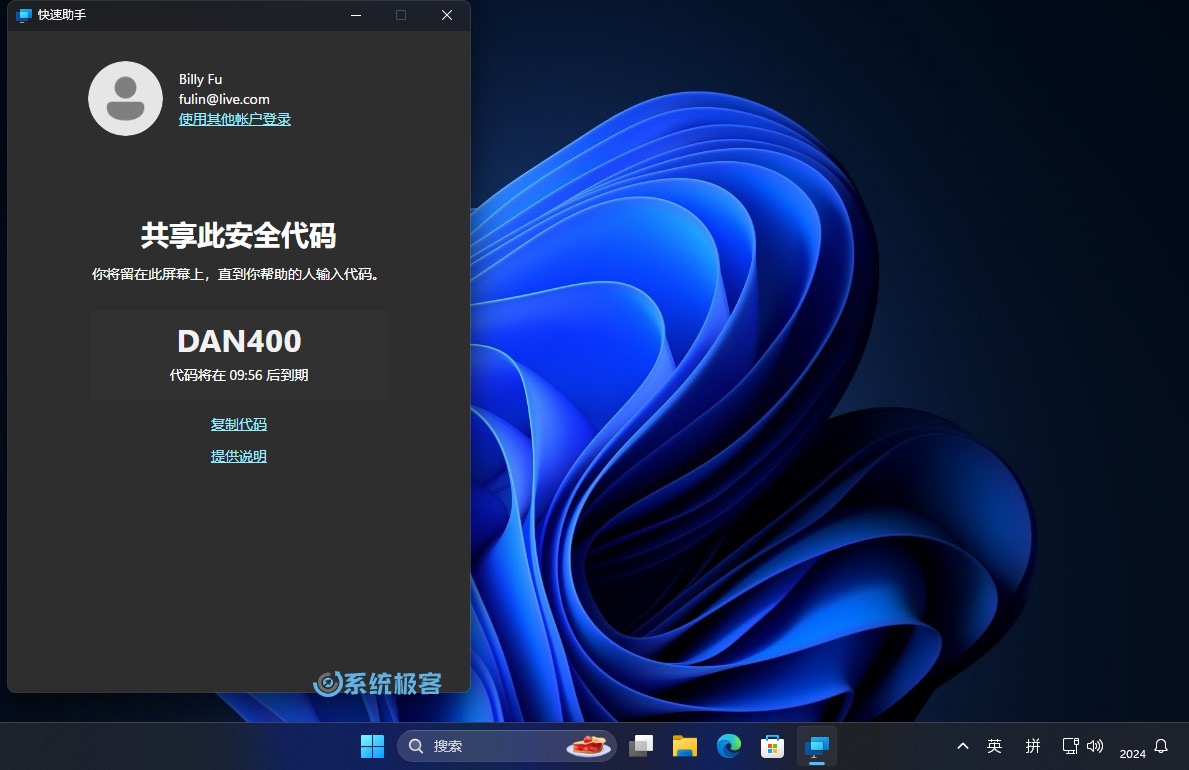 Quick Assistant: Remote helper generates security code
When you get help:
1Enter the security code before expiration.
2Click "Share Screen".
3 Click "Allow" to authorize the other party to view or control your screen.
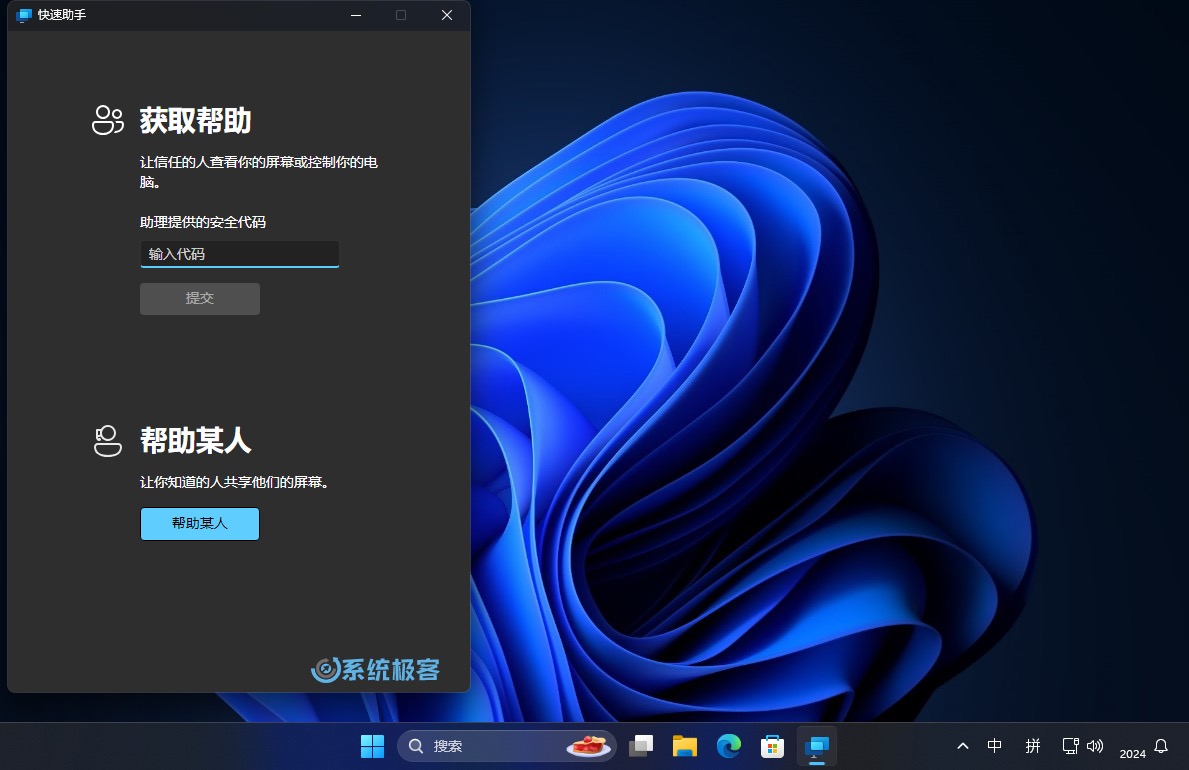 Quick Assistant: The recipient fills in the security code
Recommended reading: How to use Windows Quick Assistant for remote assistance
Method 5: Use the Troubleshooter tool to troubleshoot the issue
Windows 11 has a series of built-in troubleshooting tools that can automatically detect and repair system problems, covering audio, network, Windows updates and other aspects.
1 Press the Windows I shortcut key to open "Settings" and click "System" > "Troubleshooting" > "Other Troubleshooting".
2Click "Run" the troubleshooting tool according to the type of problem encountered.
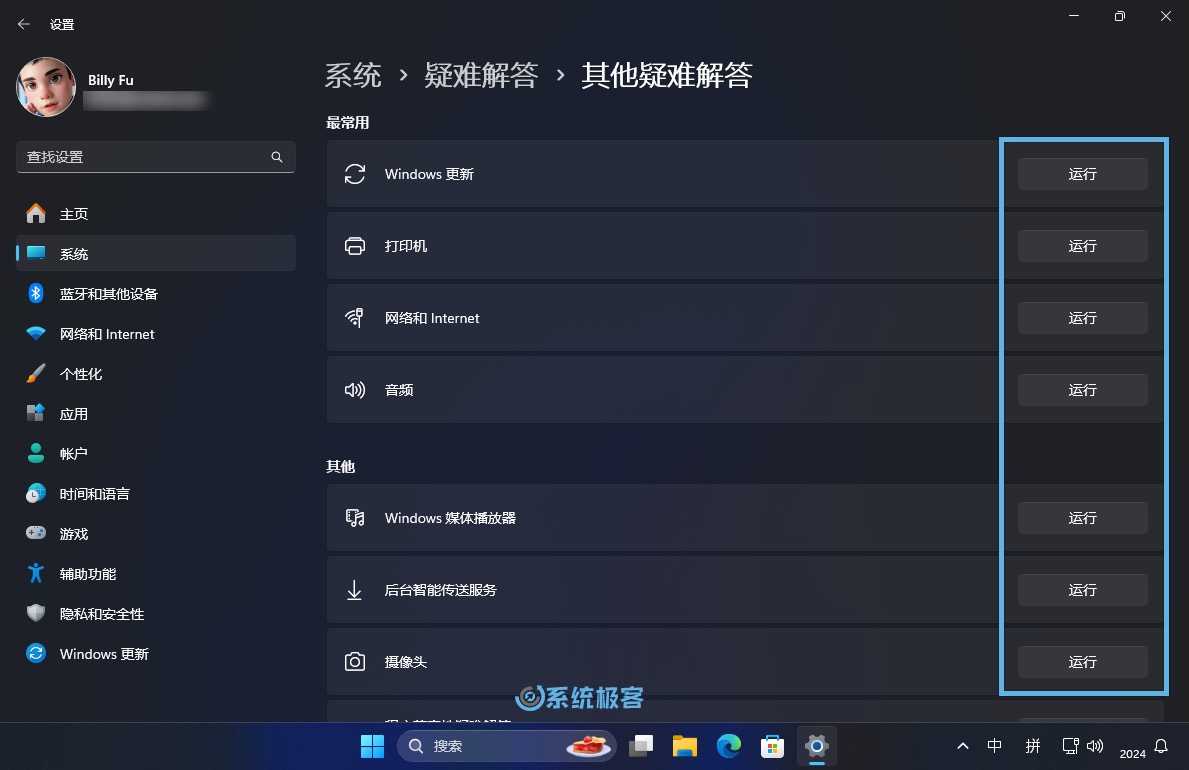 "Run" troubleshooting tool
3 The troubleshooting tool automatically scans the system and provides solutions or automatic repairs.
The "Troubleshooting" tool plans to migrate to the "Get Help" troubleshooting platform in 2024.
Method 6: Use the F1 shortcut key to access the help document
In Windows 11, pressing the F1 shortcut key is still the fastest way to get help. Different applications may respond differently to the F1 key, but it usually opens a help document or online support page.
1 Make sure the application is in the active window state.
2 Press the F1 key to usually open the help page of the application.
For example, pressing F1 in the Edge browser will open the Microsoft Edge Help and Learning page.
Method 7: Using Windows Copilot
Windows Copilot can answer your questions about Windows 11 and provide solutions or suggestions. Or perform some actions directly, such as launching a "troubleshooting" tool.
1Use the Windows C shortcut key to start Windows Copilot.
2Enter your question or task that needs to be completed.
3Follow the suggestions or steps provided by Copilot.
For example, you can ask Copilot the following questions:
- How to change the theme of Windows 11?
- How to solve network connection problems?
- How to improve computer performance?
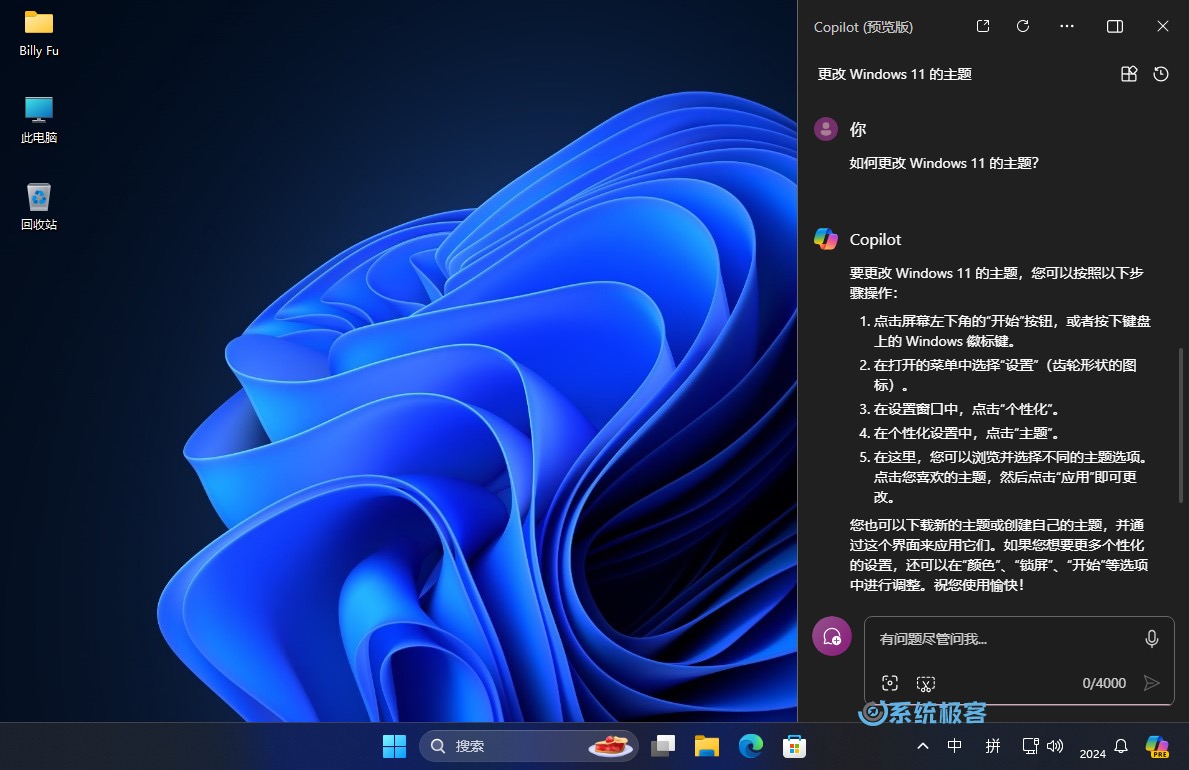 Ask a question to Windows Copilot
This article introduces 7 common ways to get help in Windows 11, including using the "Getting Started" app, "Tips" app, "Get Help" app, "Quick Assistant" remote assistance, "Troubleshooting" tools, and F1 shortcut key. Additionally, we provide a brief introduction to using Windows Copilot.
Hope these methods can help you find solutions quickly when you encounter problems.
The above is the detailed content of How to get help in Windows 11. For more information, please follow other related articles on the PHP Chinese website!

Hot AI Tools

Undress AI Tool
Undress images for free

Undresser.AI Undress
AI-powered app for creating realistic nude photos

AI Clothes Remover
Online AI tool for removing clothes from photos.

ArtGPT
AI image generator for creative art from text prompts.

Stock Market GPT
AI powered investment research for smarter decisions

Hot Article
Hot Tools

Notepad++7.3.1
Easy-to-use and free code editor

SublimeText3 Chinese version
Chinese version, very easy to use

Zend Studio 13.0.1
Powerful PHP integrated development environment

Dreamweaver CS6
Visual web development tools

SublimeText3 Mac version
God-level code editing software (SublimeText3)


 How to switch independent graphics cards in win10 system
Sep 26, 2025 pm 01:39 PM
How to switch independent graphics cards in win10 system
Sep 26, 2025 pm 01:39 PM
Currently, many users' computers are equipped with independent graphics cards in addition to the core graphics cards that come with the CPU. In Windows 10 systems, core graphics cards are preferred by default, and separate graphics cards are called only when large applications are executed. So, if we want to use a separate graphics card throughout the whole process, how should we set it up? Next, let’s share with you the specific steps for switching independent graphics cards in Windows 10 system. How to switch to a discrete graphics card in Windows 10 Because my computer is equipped with a NVIDIA graphics card, here I will take switching to a NVIDIA discrete graphics card as an example. First, open the control panel and click Hardware and Sound. Under the Hardware and Sound options, find and click on the NVIDIA Control Panel
 How to pin any file to the start screen in win8 system
Sep 26, 2025 pm 01:48 PM
How to pin any file to the start screen in win8 system
Sep 26, 2025 pm 01:48 PM
Everyone should know that after upgrading to Windows 8, many operating methods have changed a lot compared to the past. The most inconvenient thing is that the system cancels the traditional start menu by default. This change not only makes many users unable to find the shutdown option, but also makes some habitual operations in daily use cumbersome. For example, in the past, we could fix common software in the start menu and click to start it if needed. However, in Win8 systems, this operation method does not seem to be applicable anymore. In fact, the Win8 system provides a Metro interface to replace the traditional start menu function. If you want quick access to certain programs, you can totally pin them to the start screen. Next, the editor will introduce you in detail how to achieve this
 The Win10 patch cannot be updated. The solution to the Win10 patch is always failed to update.
Sep 26, 2025 pm 01:42 PM
The Win10 patch cannot be updated. The solution to the Win10 patch is always failed to update.
Sep 26, 2025 pm 01:42 PM
What should I do if the Win10 system patch update fails? Win10 will regularly launch patch updates, and users can choose to download automatically or manually according to their needs. However, some users often have problems when updating patches on their win10 system. So what should we do if the Win10 patch update fails? Next, the editor will introduce the solution to the failure of Win10 patch installation. The solution steps are as follows: Method 1: Check whether the update service is running normally. 1. Press the "Windows R" key combination and enter "services.msc" to open the service window. 2. Ensure BackgroundIntelligentTransferService Service and Cryptographic
 How to enable reading mode by 360 browser_360 browser immersive reading mode activation tutorial
Sep 28, 2025 am 10:21 AM
How to enable reading mode by 360 browser_360 browser immersive reading mode activation tutorial
Sep 28, 2025 am 10:21 AM
360 Browser can enable reading mode through address bar icons, F9 shortcut keys or menu options, automatically extract articles and optimize typesetting, providing an immersive reading experience without interference.
 What are the restrictions on Surface Pro X running Win10 on ARM?
Sep 28, 2025 am 10:57 AM
What are the restrictions on Surface Pro X running Win10 on ARM?
Sep 28, 2025 am 10:57 AM
There is no doubt that Microsoft's latest SurfaceProX is a remarkable product, and Microsoft's official website in China has opened the reservation channel for this device. However, there are some key points to be paid attention to before you decide to buy this device. The device comes with a Microsoft SQ1 custom processor, which means you may encounter some issues and limitations when running the Windows 10onARM operating system. Recently, Microsoft officially released a new support document detailing the possible compatibility issues when using Windows 10onARM processor. The article mentioned many issues in drivers, printers, games, etc., and pointed out that it is only designed for Windows 10onAR
 How to solve the problem of cortana not working in win10 system
Sep 28, 2025 am 11:12 AM
How to solve the problem of cortana not working in win10 system
Sep 28, 2025 am 11:12 AM
We know that a very interesting intelligent voice assistant is built into Windows 10 system - Cortana (also affectionately called "Xiaona". When we want to quickly find an application but don’t want to manually search one by one, just send an instruction to "Xiao Na" and she can quickly tell us the location of the application, which is very convenient to use. However, recently, some users reported that they encountered the problem that Cortana could not function properly during use, and the system prompted that the service was abnormal. So how to deal with it? Next, I will introduce an effective solution to you. The operation steps are as follows: 1. Return to the Windows 10 desktop, press the "Win" key and "R" key on the keyboard at the same time to open the "Run" dialog box. Enter
 What should I do if the icon name of the win10 system taskbar is not displayed?
Sep 28, 2025 am 11:18 AM
What should I do if the icon name of the win10 system taskbar is not displayed?
Sep 28, 2025 am 11:18 AM
Usually, when we start a program, the program icon and name will be displayed in the taskbar. However, recently a user using Windows 10 system found that only icons were displayed on his taskbar but no names were displayed, which made him very troubled. So, in response to this problem, how should Windows 10 system solve the problem that the taskbar icon name is not displayed? Next, I will introduce an effective solution to you. The specific operation steps are as follows: Right-click the mouse in the blank area of the taskbar, and then select "Task Bar Settings" in the menu that appears, as shown in the figure: After entering the taskbar interface for personalized settings, find the "Merge Taskbar Buttons" option, click the selection box below, and then select
 How to set up desktop dynamic wallpapers in Win10? How to make the desktop move with Win10?
Sep 28, 2025 am 10:36 AM
How to set up desktop dynamic wallpapers in Win10? How to make the desktop move with Win10?
Sep 28, 2025 am 10:36 AM
The Win10 operating system has become widely popular and has become an indispensable part of the daily lives of many users. Although everyone is already very familiar with the desktop background, icons and interface of Win10, it is inevitable that you will feel a little boring after using it for a long time. If you can replace static wallpaper with dynamic wallpaper, it will undoubtedly add a touch of freshness to life. Next, I will introduce you how to replace dynamic wallpapers for Windows 10. The specific operation steps are as follows: Click the "Start" button in the lower left corner of the Win10 desktop, find the "Settings" option from the menu and click to enter. Find the "Personalization" option in the upper right corner of the settings window and click. After entering the personalized settings page, scroll down in the background settings below the lock screen preview picture to adjust the lock screen style. After scrolling down, you can
