


How to cancel forced line breaks in word

How to cancel forced line breaks in word: 1. Click Start, open the Word document, and click the Start option in the upper left corner of the interface; 2. Select Show Template, click the Save item in the new window, and in the pop-up Select Display in the tab; 3. Uncheck, find the paragraph mark, and remove the check mark behind it; 4. Click Confirm and confirm, and click OK to cancel word forced line wrapping.

Forced line breaks in word during study and work are very convenient for our content editing and input, but sometimes we find this very annoying. The editor of PHP Chinese website is now Let’s introduce how to simply cancel the forced line wrapping function.
1. Click Start
Open the Word document and click the Start option in the upper left corner of the interface.

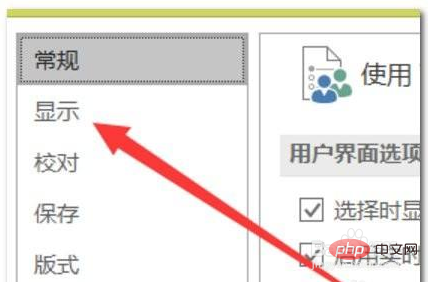
2. Select to display Wentuo
in the new Click the Save option in the window and select Display in the pop-up tab.

##3. Uncheck
Find the paragraph mark and remove the check mark behind it.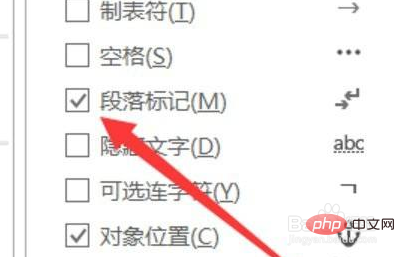
4. Click OK to confirm
Click OK to cancel the word forced line wrapping.
The above is the detailed content of How to cancel forced line breaks in word. For more information, please follow other related articles on the PHP Chinese website!

Hot AI Tools

Undress AI Tool
Undress images for free

Undresser.AI Undress
AI-powered app for creating realistic nude photos

AI Clothes Remover
Online AI tool for removing clothes from photos.

ArtGPT
AI image generator for creative art from text prompts.

Stock Market GPT
AI powered investment research for smarter decisions

Hot Article
Hot Tools

Notepad++7.3.1
Easy-to-use and free code editor

SublimeText3 Chinese version
Chinese version, very easy to use

Zend Studio 13.0.1
Powerful PHP integrated development environment

Dreamweaver CS6
Visual web development tools

SublimeText3 Mac version
God-level code editing software (SublimeText3)


 Detailed explanation of Word document operation: merge two pages into one
Mar 26, 2024 am 08:18 AM
Detailed explanation of Word document operation: merge two pages into one
Mar 26, 2024 am 08:18 AM
Word documents are one of the most frequently used applications in our daily work and study. When working with documents, you may sometimes encounter a situation where you need to merge two pages into one. This article will introduce in detail how to merge two pages into one page in a Word document to help readers handle document layout more efficiently. In Word documents, the operation of merging two pages into one is usually used to save paper and printing costs, or to make the document more compact and neat. The following are the specific steps to merge two pages into one: Step 1: Open the Word that needs to be operated
 How to convert pdf to word
Apr 30, 2024 pm 05:58 PM
How to convert pdf to word
Apr 30, 2024 pm 05:58 PM
1. Use online conversion tools such as Smallpdf, Adobe Acrobat or Zamzar. 2. These tools usually provide an easy-to-use interface, allowing users to upload PDF files and optionally convert them to Word format. 3. After the conversion is completed, users can download the Word document and perform further editing. 4. Use professional PDF conversion software, such as Adobe Acrobat Pro or Wondershare PDFelement.
 Put a √ symbol in the word box
May 07, 2024 pm 01:06 PM
Put a √ symbol in the word box
May 07, 2024 pm 01:06 PM
1. Open the Word document and move the cursor to the position in the box where the √ symbol needs to be inserted. 2. Select the [Insert] option on the menu bar. In the [Insert] option, find the [Symbol] group and click the [Symbol] button. 3. In the pop-up symbol dialog box, select the [Common Mathematical Symbols] category and find the [√] symbol among the common mathematical symbols. 4. Click the √ symbol and click the [Insert] button to insert the √ symbol in the box.
 Why do words disappear after typing in word?
Apr 28, 2024 pm 01:45 PM
Why do words disappear after typing in word?
Apr 28, 2024 pm 01:45 PM
1. Text box overflow: If you use a text box in your document and the text in the text box is cropped or disappears, it may be because the text box is not large enough to accommodate all the text. The solution is to resize the text box so that all text can be displayed. 2. Line breaks and page breaks: The line breaks and page breaks in Word may cause text to disappear in some cases. Make sure text is not accidentally broken or hidden at the edge of the page. This problem can be solved by adjusting the page margins, line spacing, or manually inserting page breaks.
 Easily learn how to create Word document tables
Mar 26, 2024 am 08:39 AM
Easily learn how to create Word document tables
Mar 26, 2024 am 08:39 AM
With the development of science and technology, computers have become one of the indispensable tools for our daily work and study. In computer office work, Word documents, as one of the most commonly used word processing software, also have many practical functions. Among them, making tables is undoubtedly one of the commonly used functions. This article will introduce you how to easily learn how to create tables in Word documents, so that you can use Word software to work and study more efficiently. First, open your Word document and select where you want to insert the table. In the Word menu bar
 How to generate word directory
Apr 28, 2024 pm 01:52 PM
How to generate word directory
Apr 28, 2024 pm 01:52 PM
1. First, open your Word document and move the cursor to the location where you want to add a table of contents. 2. Then, click the [Reference] tab in the menu bar at the top of the Word document. 3. Under the [References] tab, you will see a button named [Table of Contents], click it. 4. In the pop-up menu, you can choose different catalog styles, such as [Automatic Catalog 1] or [Customized Catalog]. 5. Choose a style that suits your document style. Once you select a table of contents style, Word will automatically generate a table of contents for you and create a table of contents based on the headings and subheadings in your document.
 Detailed explanation of Word document encryption method
Mar 25, 2024 pm 10:03 PM
Detailed explanation of Word document encryption method
Mar 25, 2024 pm 10:03 PM
In today's era of highly developed information technology, protecting the security of personal and confidential data is crucial. In daily work and study, we often need to use Word documents to store and process various important information. In order to prevent these documents from being viewed or tampered with by unauthorized persons, encryption of Word documents is particularly important. This article will introduce in detail how to encrypt Word documents to help readers better protect the security of their document information. 1. Use password to encrypt Word document. Open the Word document that needs to be encrypted and click "File"
 Trouble with pagination? Teach you how to solve the problem of page breakage in Word tables
Mar 25, 2024 pm 09:09 PM
Trouble with pagination? Teach you how to solve the problem of page breakage in Word tables
Mar 25, 2024 pm 09:09 PM
Word tables are often used in daily work and study, but when typesetting, you may encounter tables that span across pages, especially when there is a lot of table content, page breaks are more likely to occur. In response to this problem, this article will introduce how to solve the problem of page breaks in Word tables from several aspects. 1. Adjust row height and column width When formatting tables, appropriately adjusting row height and column width can effectively reduce the possibility of the table spanning two pages. You can set the row height of the table to an appropriate value so that the table content can be completely displayed on one page to avoid excessive content.