nginx动静分离介绍
nginx的静态处理能力很强,但是动态处理能力不足,因此,在企业中常用动静分离技术
针对php的动静分离
静态页面交给nginx处理
动态页面交给php-fpm模块或apache处理
在nginx的配置中,是通过location配置段配合正则匹配实现静态与动态页面的不同处理方式
反向代理原理
nginx不仅能作为web服务器,还具有反向代理、负载均衡和缓存的功能
nginx通过proxy模块实现将客户端的请求代理至上游服务器,此时nginx与上游服务器的连接是通过http协议进行的
nginx在实现反向代理功能时的最重要指令为proxy_ pass,它能够并能够根据uri、客户端参数或其它的处理逻辑将用户请求调度至上游服务器
配置nginx实现动静分离
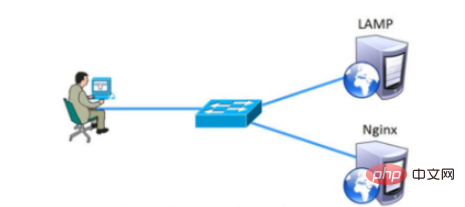
本案例根据企业需要,将配置nginx实现动静分离,对php页面的请求转发给lamp处理,而静态页面交给nginx处理,以实现动静分离
架构如图所示

配置步骤
1、架设并调试后端lamp环境
①安装apache服务
[root@localhost ~]# yum install httpd httpd-devel -y
②在防火墙设置http服务的权限
[root@localhost ~]# firewall-cmd --permanent --zone=public --add-service=http
success
[root@localhost ~]# firewall-cmd --permanent --zone=public --add-service=https
success
[root@localhost ~]# firewall-cmd --reload
success
[root@localhost ~]# systemctl start httpd
③安装mariadb
mariadb数据库管理系统是mysql的一个分支,主要由开源社区在维护,采用gpl授权许可 mariadb的目的是完全兼容mysql,包括api和命令行,使之能轻松成为mysql的代替品
[root@localhost ~]# yum install mariadb mariadb-server mariadb-libs mariadb-devel -y
[root@localhost ~]# systemctl start mariadb.service
④mysql安全配置向导
[root@localhost ~]# mysql_secure_installation
⑤安装php及支持的软件
[root@localhost ~]# yum install php -y
[root@localhost ~]# yum install php-mysql -y
[root@localhost ~]# yum install php-gd php-ldap php-odbc php-pear php-xml php-xmlrpc php-mbstring php-snmp php-soap curl curl-devel php-bcmath -y
⑥更改网页主页面
[root@localhost ~]# cd /var/www/html
[root@localhost html]# vim index.php
<?php
  echo "this is apache test web";
?>

[root@localhost html]# systemctl restart httpd
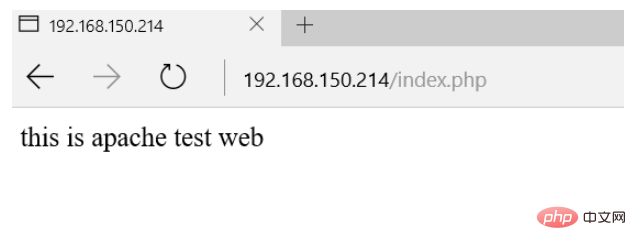
⑦访问测试,输入网址

2、编译安装nginx
①安装支持软件
[root@localhost ~]# yum install gcc gcc-c++ pcre-devel zlib-devel -y
②创建运行用户和组
[root@localhost ~]# useradd -m -s /sbin/nologin nginx
③编译安装
[root@localhost lnmp-c7]# tar zxvf nginx-1.12.2.tar.gz -c /opt
[root@localhost lnmp-c7]# cd /opt/nginx-1.12.2/
[root@localhost nginx-1.12.2]# ./configure \
> --prefix=/usr/local/nginx \
> --user=nginx \
> --group=nginx \
> --with-http_stub_status_module

[root@localhost nginx-1.12.2]# make && make install
[root@localhost nginx-1.12.2]# ln -s /usr/local/nginx/sbin/nginx /usr/local/sbin
④服务管理控制
[root@localhost ~]# vim /etc/init.d/nginx
#!/bin/bash
# chkconfig: - 99 20
# description: ngins service control script
prog="/usr/local/nginx/sbin/nginx"
pidf="/usr/local/nginx/logs/nginx.pid"
case "$1" in
start)
  $prog
  ;;
stop)
  kill -s quit $(cat $pidf)
  ;;
restart)
   $0 stop
   $0 start
   ;;
reload)
   kill -s hup $(cat $pidf)
   ;;
*)
   echo "usage: $0 {start|stop|restart|reload}"
   exit 1
esac
exit 0

[root@localhost ~]# chmod +x /etc/init.d/nginx
[root@localhost ~]# chkconfig --add nginx
[root@localhost ~]# service nginx start⑤启动服务
[root@nginx ~]# systemctl stop firewalld.service
[root@nginx ~]# setenforce 0
[root@nginx ~]# service nginx start
⑥配置nginx处理动态页面请求
[root@nginx ~]# vim /usr/local/nginx/conf/nginx.conf
    location ~ \.php$ {
      proxy_pass  http://192.168.150.214;
    }

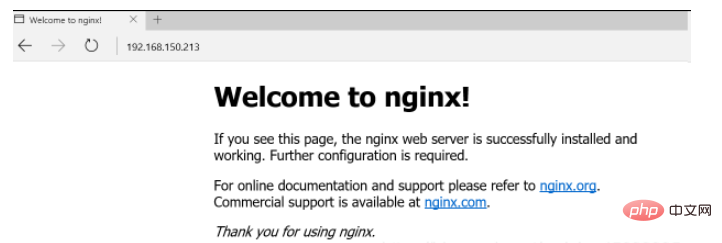
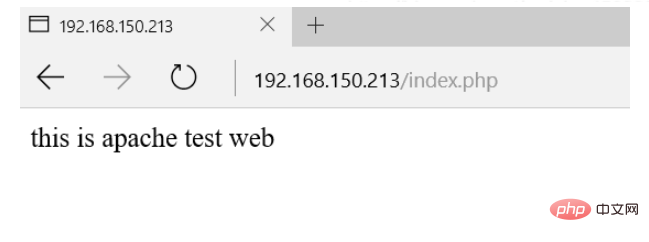
[root@nginx ~]# service nginx restart⑦访问测试


Das obige ist der detaillierte Inhalt vonSo stellen Sie Nginx+Apache bereit und trennen dynamisch und statisch. Für weitere Informationen folgen Sie bitte anderen verwandten Artikeln auf der PHP chinesischen Website!
 Nginx-Neustart
 Detaillierte Erläuterung der Nginx-Konfiguration
 Detaillierte Erläuterung der Nginx-Konfiguration
 Was bedeutet Apache?
 Der Apache-Start ist fehlgeschlagen
 Was sind die Unterschiede zwischen Tomcat und Nginx?
 js-Methode zum Generieren von Zufallszahlen
 So fügen Sie HTML einen CSS-Stil hinzu


