
Schritte zum Aufbau und zur Konfiguration der PHP-Umgebung:
1. Software- und Systemversion

System-Download-Adresse:
Softwarepaket-Download-Adresse: http://xiazai.jb51.net/201611/yuanma/php+apache+mysql(jb51 .net).rar
2. Softwarepaket herunterladen/Quelle ändern
(1) Softwarepaket herunterladen und installieren
yum install - y wget vim unzip zip

(2) Quelle ändern
1 Deinstallieren Sie zuerst das zuvor installierte Epel, um Auswirkungen auf
RPM zu vermeiden. e epel -release
2. Lecker-Cache löschen
lecker alles reinigen

lecker-Makecache
3 -rf /etc/yum.repos.d/* (Denken Sie bei der Durchführung dieses Vorgangs daran, wget im Voraus zu installieren. Andernfalls müssen Sie die CD mounten und rpm verwenden, um wget zu installieren.)

4. Ali-Quelle herunterladen
wget -P /etc/yum.repos.d/ http://mirrors.aliyun.com/repo/epel-6.repohttp:/ /mirrors.aliyun. com/repo/Centos-6.repo
5,
yum repolist

Verwandte Empfehlungen: „PHP-Einführungs-Tutorial 》
3. MySQL installieren
(1) Entpacken
tar -zxvf mysql-5.1.72- linux-x86_64-glibc23 .tar.gz

(2) MySQL konfigurieren
mv mysql-5.1.72-linux-x86_64-glibc23 /usr/local/mysql
cd /usr/local/mysql
useradd -s /sbin/nologin mysql
mkdir -p /data/mysql
chown -R mysql:mysql /data/mysql
./scripts/mysql_install_db --user=mysql --datadir= /data/mysql
Überprüfen Sie, ob die Kompilierung erfolgreich ist
echo $?

(3) Machen Sie MySQL zu einem Dienst
cp support-files/my-large.cnf /etc/my.cnf
cp support-files/mysql.server /etc/init.d/mysqld
chmod 755 /etc/init.d/mysqld
vim /etc/init.d/mysqld
Ändern Sie den Dateiinhalt
basedir=/usr/local/mysql (MySQL-Installationsverzeichnis)
datadir=/data/mysqlMySQL-Datenbankverzeichnis)
chkconfig --add mysqld
chkconfig mysqld on
4. Installieren Sie Apache
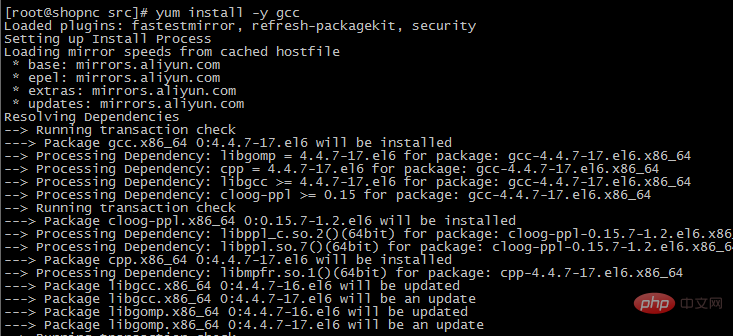
(1) Installieren Sie die Software-Ausführungsumgebung gcc
yum install - y gcc

(2) Dekomprimieren
tar -jxvf httpd-2.2.27.tar.bz2

(3) Kompilieren
./configure --prefix=/usr/local/apache2 --enable-mods-shared=most --enable-so

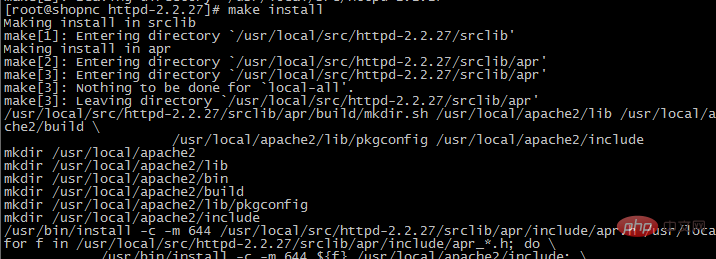
(4) Installieren
make

make install

5. PHP installieren
(1) Entpacken Sie
tar -zxvf php-5.3.28.tar.gz

(2) Erforderlich für die Installation des PHP-Software-Plug-ins
yum install -y libxml2-devel.x86_64
yum install -y openssl-devel.x86_64
yum install -y bzip2-devel.x86_64
yum install -y libjpeg-turbo-devel.x86_64
yum install -y libpng-devel.x86_64
yum install -y freetype-devel.x86_64
yum install -y libmcrypt-devel.x86_64

(3) Kompilieren Sie den
-Code wie folgt:
./configure --prefix=/usr/local/php
--with-apxs2=/usr/local/apache2/bin/apxs
--with-config-file-path=/usr/local/php/etc
--with-mysql=/usr/local/mysql
--with-libxml-dir
--with-gd
--with-jpeg-dir
--with-png-dir
--with-freetype-dir
--with-iconv-dir
--with-zlib-dir
--with-bz2
--with-openssl
--with-mcrypt
--enable-soap
--enable-gd-native-ttf
--enable-mbstring
--enable-sockets
--enable-exif
--disable-ipv6

(4) Installieren
make

make install

六、编辑配置文件
(1)vim /usr/local/apache2/conf/httpd.conf找到:
<Directory />
 Options FollowSymLinks
 AllowOverride None
 Order deny,allow
 Deny from all
</Directory>
改为:
<Directory />
 Options FollowSymLinks
 AllowOverride None
 Order deny,allow
 Allow from all
</Directory>
找到:
AddType application/x-gzip .gz .tgz
在该行下面添加:
AddType application/x-httpd-php .php
找到:
<IfModule dir_module>
 DirectoryIndex index.html
</IfModule>
将该行改为:
<IfModule dir_module>
 DirectoryIndex index.html index.htm index.php
</IfModule>
找到:
#ServerName www.example.com:80
修改为:
ServerName localhost:80
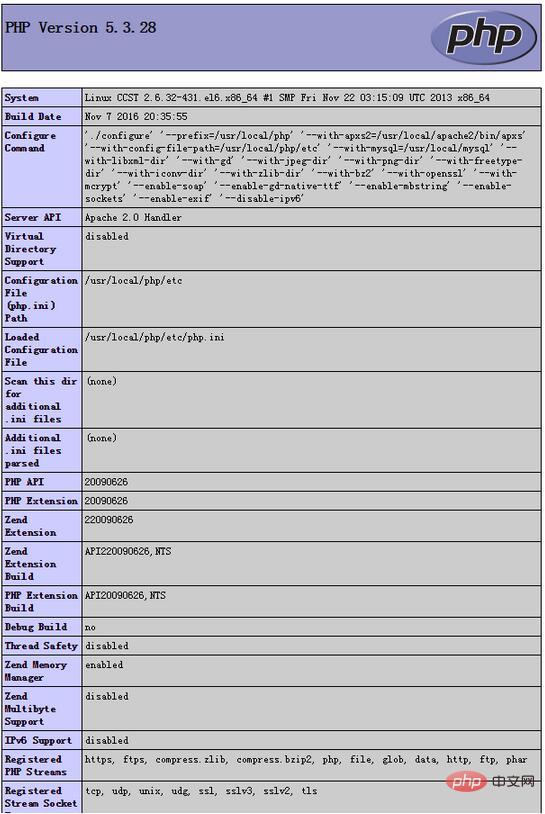
2 测试解析php
vim /usr/local/apache2/htdocs/1.php
写入:
<?php
phpinfo();
?>
浏览器打开:地址/1.php

Das obige ist der detaillierte Inhalt vonWelche Schritte sind zum Einrichten und Konfigurieren der PHP-Umgebung erforderlich?. Für weitere Informationen folgen Sie bitte anderen verwandten Artikeln auf der PHP chinesischen Website!
 So öffnen Sie eine PHP-Datei
 So entfernen Sie die ersten paar Elemente eines Arrays in PHP
 Was tun, wenn die PHP-Deserialisierung fehlschlägt?
 So verbinden Sie PHP mit der MSSQL-Datenbank
 So verbinden Sie PHP mit der MSSQL-Datenbank
 Nullbasiertes Java-Selbstlern-Tutorial
 So laden Sie HTML hoch
 So lösen Sie verstümmelte Zeichen in PHP