<!DOCTYPE html><html lang="en"><head>
<meta charset="" ="utf-8">
<link rel="stylesheet" type="text/css" href="./css/a.css">
<script type=text/javascript src="./js/b.js"></script></head>
<title>caculator</title></head><body onload="onload">
<p id="main">
<p class="jieguo">
<input type="text" id="screenname" name="screenname" class="screen" value="" onfocus="jsp(this)">
</p>
<p class="keys">
<p class="key1">
<input type="button" id="AC" onclick="clearNum()" value="AC" class="buttons">
<input type="button" id="←" onclick="tuiGe()" value="←" class="buttons">
<input type="button" id="%" onclick="jsq(this.id)" value="%" class="buttons">
<input type="button" id="&pide;" onclick="jsq(this.id)" value="&pide;" class="buttons" style="background-color: #ffbb66">
</p>
<p class="key2">
<input type="button" id="7" onclick="clearNum()" value="7" class="buttons">
<input type="button" id="8" onclick="tuiGe()" value="8" class="buttons">
<input type="button" id="9" onclick="jsq(this.id)" value="9" class="buttons">
<input type="button" id="×" onclick="jsq(this.id)" value="×" class="buttons" style="background-color: #ffbb66">
</p>
<p class="key3">
<input type="button" id="4" onclick="clearNum()" value="4" class="buttons">
<input type="button" id="5" onclick="tuiGe()" value="5" class="buttons">
<input type="button" id="6" onclick="jsq(this.id)" value="6" class="buttons">
<input type="button" id="-" onclick="jsq(this.id)" value="-" class="buttons" style="background-color: #ffbb66">
</p>
<p class="key4">
<input type="button" id="1" onclick="clearNum()" value="1" class="buttons">
<input type="button" id="2" onclick ="tuiGe()" value="2"class="buttons">
<input type="button" id="3" onclick="jsq(this.id)" value="3" class="buttons">
<input type="button" id="+" onclick="jsq(this.id)" value="+" class="buttons" style="background-color: #ffbb66">
</p>
<p class="key5">
<input type="button" id="0" onclick="jsq(this.id)" value="0" class="buttons">
<input type="button" id="." onclick="jsq(this.id)" value="." class="buttons" style="width: 100px;height: 50px;">
<input type="button" id="=" onclick="eva()" value="=" class="buttons" style="width: 100px;height: 50px;background-color: #ffbb66">
</p>
</p>
</p></body></html>a.css
body,html,.key{
      margin: 0px;
      padding: 0px;}
#main{
    margin-left: 35%;
    }
.jieguo input{
    width: 400px;
    height: 40px;
    top: 500px;
    text-align: center;
    border-radius: 8px;
    text-align: center;}
.keys{
    margin-left: 0;
    width: 400px;}
    .key1 input{
    width: 100px;
    height: 50px;
    float: left;
    margin-left: 0px;
    background-color: #AAAAAA;
    border:1px solid black;}
.key2 input{
    width: 100px;
    height: 50px;
    float: left;
    margin-left: 0px;
    background-color: #DDDDDD;
    border:1px solid black;}
.key3 input{
    width: 100px;
    height: 50px;
    float: left;
    padding: 0px,auto;
    background-color: #DDDDDD;
    border:1px solid black;}
.key4 input{
    width: 100px;
    height: 50px;
    float: left;
    margin-left: 0px;
    background-color: #DDDDDD;
    border:1px solid black;}
.key5 input{
    width: 200px;
    height: 50px;
    background-color: #DDDDDD;
    float: left;
    margin-left: 0px;
border:1px solid black;}b.js
var numresult;
var str;
var input ;function onclicknum(nums) {
    input = document.getElementById("screenname");
    input.value= input.value + nums;
}
function onclickclear() {
    input = document.getElementById("screenname");
    input.value= "";
}
function onclickresult() {
    input = document.getElementById("screenname");
    numresult = eval(input.value);
    input.value= numresult;
}
function onclickback() {
    input = document.getElementById("screenname");
    str=input.value.substring(0,input.value.length-1);
    document.getElementById("screenname").value=str;
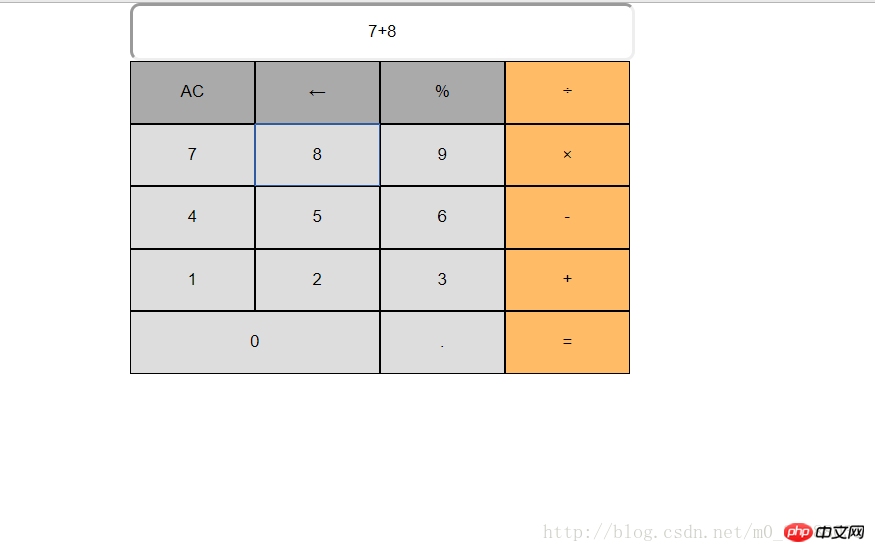
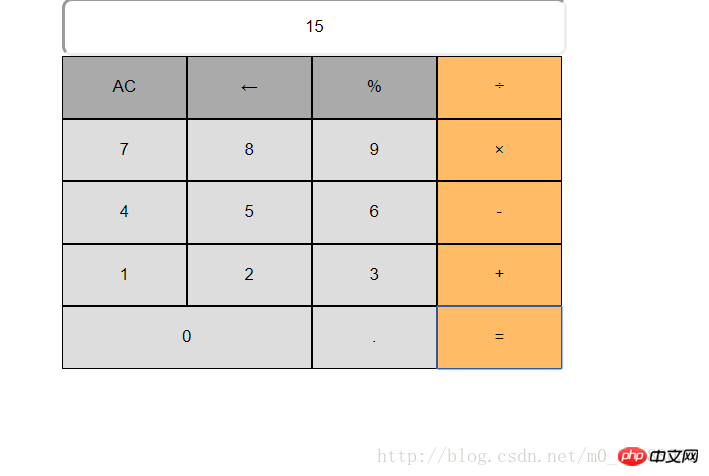
}Unter zwei setzen Beispielbilder 

Das obige ist der detaillierte Inhalt vonEine einfache Möglichkeit, die Taschenrechnerfunktion mithilfe von HTML+JS+CSS zu implementieren. Für weitere Informationen folgen Sie bitte anderen verwandten Artikeln auf der PHP chinesischen Website!


