In diesem Artikel wird hauptsächlich Python für die Implementierung eines einfachen Punkt-zu-Punkt-P2P-Chats im Detail vorgestellt, der einen gewissen Referenzwert hat.
Peer-to-Point-Chat basiert zunächst auf Multi -Thread-Netzwerkprogrammierung, und der zweite Schritt besteht darin, jede Verbindung als Objekt mit eindeutigen Attributen zu speichern und der Verbindungsliste hinzuzufügen. Die von jedem Verbindungsobjekt gesendeten Informationen müssen also drei Hauptinhalte enthalten Wenn die Informationen an den Server gesendet werden, durchläuft der Server die Verbindungsliste entsprechend dem Verbindungsobjekt, um das Zielobjekt zu finden, und sendet die Informationen an das Ziel. Nachdem das Ziel die Informationen erhalten hat, weiß es, wer sie gesendet hat Antwort entsprechend der ID-Nummer. Diese Implementierung wird weiter verbessert und nachfolgende neue Funktionen werden auf meiner persönlichen Github-Homepage angezeigt
Serverseitige Implementierung:
#coding:utf-8
'''
file:server.py
date:2017/9/10 12:43
author:lockey
email:lockey@123.com
platform:win7.x86_64 pycharm python3
desc:p2p communication serverside
'''
import socketserver,json
import subprocess

connLst = []
## 连接列表,用来保存一个连接的信息(代号 地址和端口 连接对象)
class Connector(object):#连接对象类
 def __init__(self,account,password,addrPort,conObj):
 self.account = account
 self.password = password
 self.addrPort = addrPort
 self.conObj = conObj


class MyServer(socketserver.BaseRequestHandler):

 def handle(self):
 print("got connection from",self.client_address)
 register = False
 while True:
  conn = self.request
  data = conn.recv(1024)
  if not data:
  continue
  dataobj = json.loads(data.decode('utf-8'))
  #如果连接客户端发送过来的信息格式是一个列表且注册标识为False时进行用户注册
  if type(dataobj) == list and not register:
  account = dataobj[0]
  password = dataobj[1]
  conObj = Connector(account,password,self.client_address,self.request)
  connLst.append(conObj)
  register = True
  continue
  print(connLst)
  #如果目标客户端在发送数据给目标客服端
  if len(connLst) > 1 and type(dataobj) == dict:
  sendok = False
  for obj in connLst:
   if dataobj['to'] == obj.account:
   obj.conObj.sendall(data)
   sendok = True
  if sendok == False:
   print('no target valid!')
  else:
  conn.sendall('nobody recevied!'.encode('utf-8'))
  continue

if __name__ == '__main__':
 server = socketserver.ThreadingTCPServer(('192.168.1.4',8022),MyServer)
 print('waiting for connection...')
server.serve_forever()Client -seitige Implementierung:
#coding:utf-8
'''
file:client.py.py
date:2017/9/10 11:01
author:lockey
email:lockey@123.com
platform:win7.x86_64 pycharm python3
desc:p2p communication clientside
'''
from socket import *
import threading,sys,json,re

HOST = '192.168.1.4' ##
PORT=8022
BUFSIZ = 1024 ##缓冲区大小 1K
ADDR = (HOST,PORT)

tcpCliSock = socket(AF_INET,SOCK_STREAM)
tcpCliSock.connect(ADDR)
userAccount = None
def register():
 myre = r"^[_a-zA-Z]\w{0,}"
 #正则验证用户名是否合乎规范
 accout = input('Please input your account: ')
 if not re.findall(myre, accout):
 print('Account illegal!')
 return None
 password1 = input('Please input your password: ')
 password2 = input('Please confirm your password: ')
 if not (password1 and password1 == password2):
 print('Password not illegal!')
 return None
 global userAccount
 userAccount = accout
 return (accout,password1)

class inputdata(threading.Thread):
 def run(self):
 while True:
  sendto = input('to>>:')
  msg = input('msg>>:')
  dataObj = {'to':sendto,'msg':msg,'froms':userAccount}
  datastr = json.dumps(dataObj)
  tcpCliSock.send(datastr.encode('utf-8'))


class getdata(threading.Thread):
 def run(self):
 while True:
  data = tcpCliSock.recv(BUFSIZ)
  dataObj = json.loads(data.decode('utf-8'))
  print('{} -> {}'.format(dataObj['froms'],dataObj['msg']))


def main():
 while True:
 regInfo = register()
 if regInfo:
  datastr = json.dumps(regInfo)
  tcpCliSock.send(datastr.encode('utf-8'))
  break
 myinputd = inputdata()
 mygetdata = getdata()
 myinputd.start()
 mygetdata.start()
 myinputd.join()
 mygetdata.join()


if __name__ == '__main__':
main()Beispiel für laufende Ergebnisse:
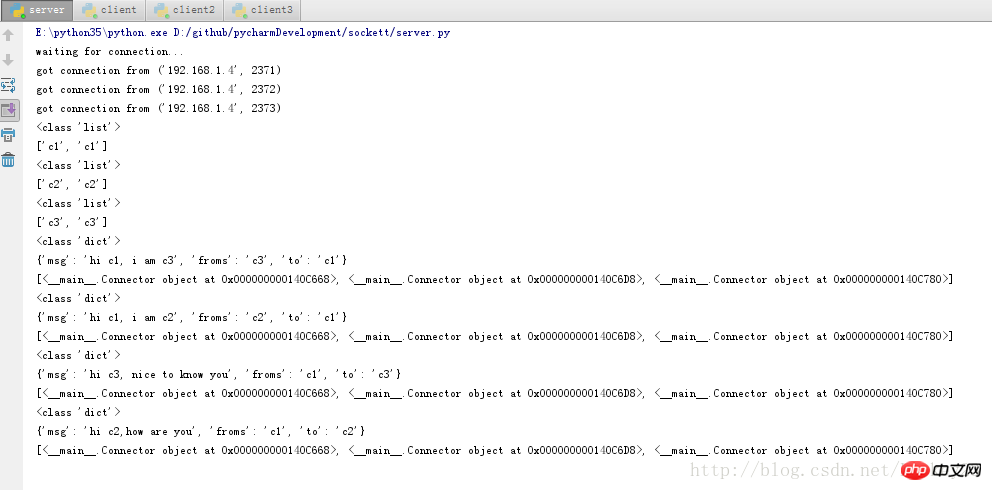
Serverseitige Ergebnisse:

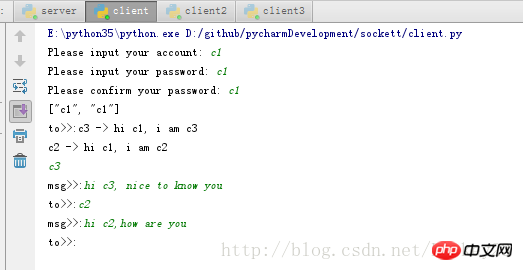
Client-Seite 1:

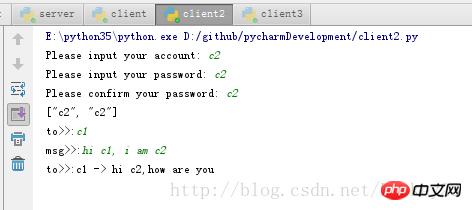
Client 2:

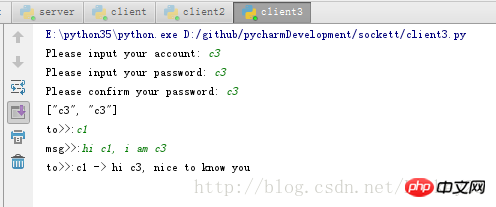
Client 3:

Das obige ist der detaillierte Inhalt vonEinfache Punkt-zu-Punkt-Implementierung in Python. Für weitere Informationen folgen Sie bitte anderen verwandten Artikeln auf der PHP chinesischen Website!


