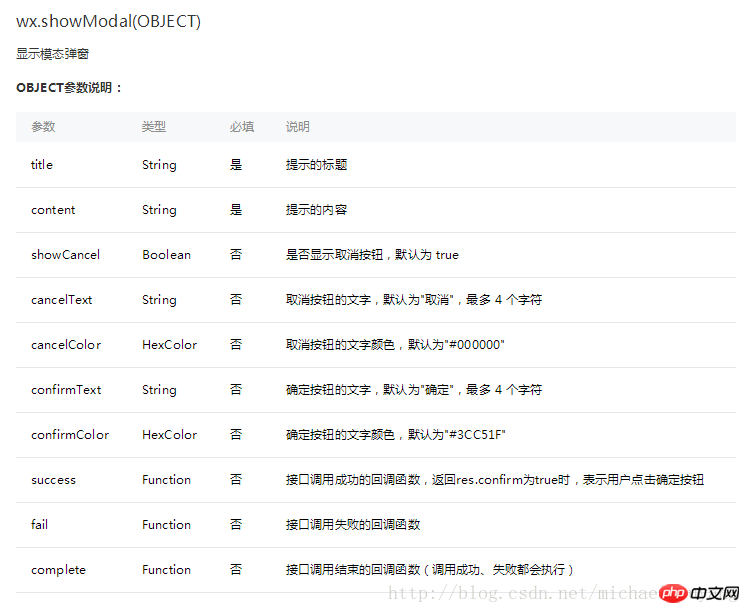
Während des Entwicklungsprozesses des Miniprogramms werden wir definitiv auf die Situation stoßen, eine Popup-Seite zu entwickeln. Schauen wir uns zunächst die offizielle Erklärung der Popup-Seite des Miniprogramms an. Die Schnittstelle der API ist wie folgt: 
Wenn Sie dem offiziellen Codebeispiel nach zu urteilen glauben, dass es einfach ist, genau wie ein Asert, können Sie die Realität nicht erkennen Anforderungen des Popup-Fensters. Deshalb hat HTML51.COM heute ein Popup-Applet-Tutorial als Referenz geschrieben.
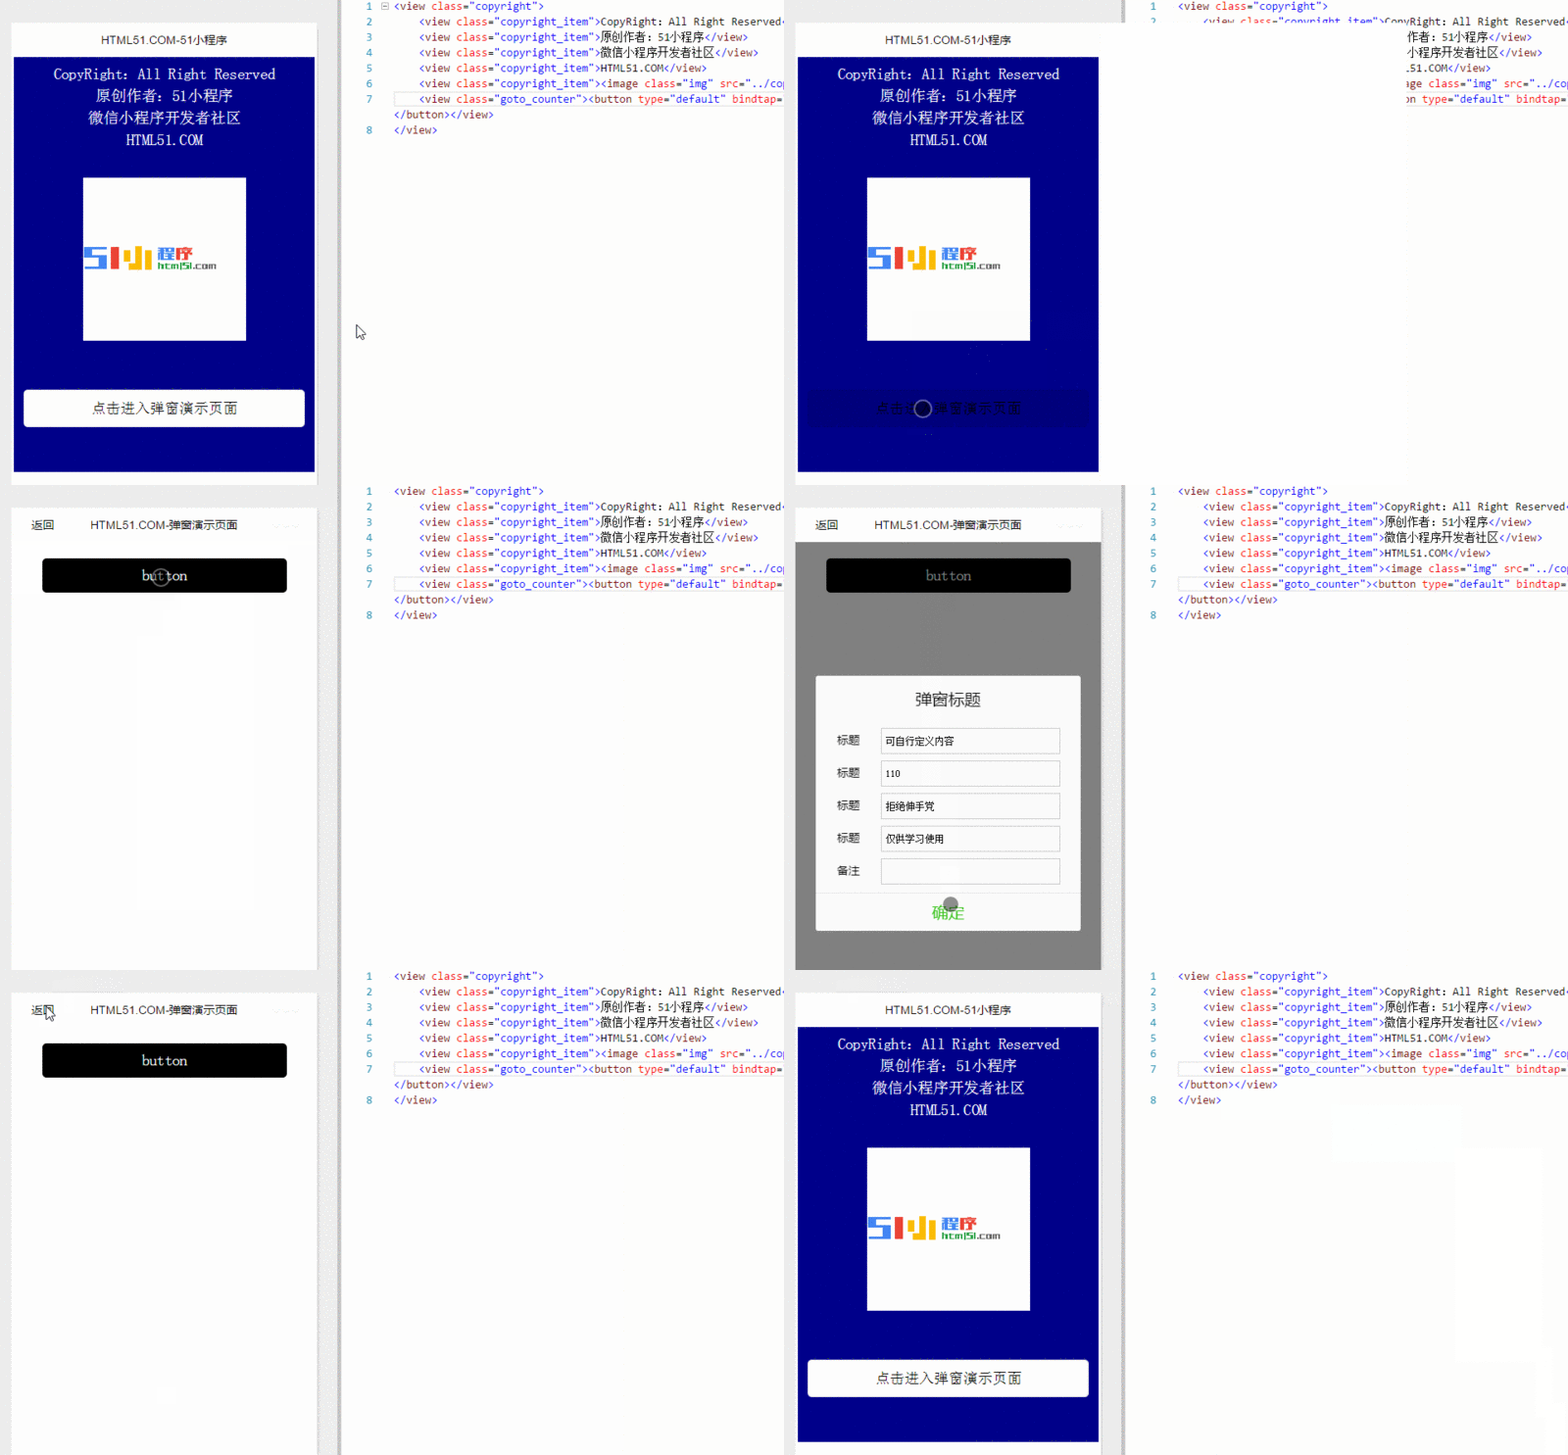
Werfen wir zunächst einen Blick auf die dynamischen Darstellungen der Homepage: 
Das erste, was wir sehen, ist der Homepage-Code:
<view class="copyright">
    <view class="copyright_item">CopyRight:All Right Reserved</view>
    <view class="copyright_item">原创作者:51小程序</view>
    <view class="copyright_item">微信小程序开发者社区</view>
    <view class="copyright_item">HTML51.COM</view>
    <view class="copyright_item"><image class="img" src="../copyright/image/logo.png"/></view>
    <view class="goto_counter"><button type="default" bindtap="goto_counter">点击进入弹窗演示页面</button></view>
</view> Natürlich ist der entscheidende Punkt nicht hier. Der Code von
index.wxml lautet wie folgt:
<!--使用animation属性指定需要执行的动画-->
<view animation="{{animationData}}" class="drawer_box" wx:if="{{showModalStatus}}">

  <!--drawer content-->
  <view class="drawer_title">弹窗标题</view>
  <view class="drawer_content">
    <view class="top grid">
      <label class="title col-0">标题</label>
      <input class="input_base input_h30 col-1" name="rName" value="可自行定义内容"></input>
    </view>
    <view class="top grid">
      <label class="title col-0">标题</label>
      <input class="input_base input_h30 col-1" name="mobile" value="110"></input>
    </view>
    <view class="top grid">
      <label class="title col-0">标题</label>
      <input class="input_base input_h30 col-1" name="phone" value="拒绝伸手党"></input>
    </view>
    <view class="top grid">
      <label class="title col-0">标题</label>
      <input class="input_base input_h30 col-1" name="Email" value="仅供学习使用"></input>
    </view>
    <view class="top bottom grid">
      <label class="title col-0">备注</label>
      <input class="input_base input_h30 col-1" name="bz"></input>
    </view>
  </view>
  <view class="btn_ok" bindtap="powerDrawer" data-statu="close">确定</view>
</view>Der Code von index.wxss lautet wie folgt:
.btn {
  width: 80%;
  padding: 20rpx 0;
  border-radius: 10rpx;
  text-align: center;
  margin: 40rpx 10%;
  background: #000;
  color: #fff;
}

/*mask*/
.drawer_screen {
  width: 100%;
  height: 100%;
  position: fixed;
  top: 0;
  left: 0;
  z-index: 1000;
  background: #000;
  opacity: 0.5;
  overflow: hidden;
}

/*content*/
.drawer_box {
  width: 650rpx;
  overflow: hidden;
  position: fixed;
  top: 50%;
  left: 0;
  z-index: 1001;
  background: #FAFAFA;
  margin: -150px 50rpx 0 50rpx;
  border-radius: 3px;
}

.drawer_title{
  padding:15px;
  font: 20px "microsoft yahei";
  text-align: center;
}
.drawer_content {
  height: 210px;
  overflow-y: scroll; /*超出父盒子高度可滚动*/
}

.btn_ok{
  padding: 10px;
  font: 20px "microsoft yahei";
  text-align: center;
  border-top: 1px solid #E8E8EA;
  color: #3CC51F;
}

.top{
    padding-top:8px;
}
.bottom {
    padding-bottom:8px;
}
.title {
    height: 30px;
    line-height: 30px;
    width: 160rpx;
    text-align: center;
    display: inline-block;
    font: 300 28rpx/30px "microsoft yahei";
}

.input_base {
    border: 2rpx solid #ccc;
    padding-left: 10rpx;
    margin-right: 50rpx;
}
.input_h30{
    height: 30px;
    line-height: 30px;
}
.input_h60{
    height: 60px;
}
.input_view{
    font: 12px "microsoft yahei";
    background: #fff;
    color:#000;
    line-height: 30px;
}

input {
    font: 12px "microsoft yahei";
    background: #fff;
    color:#000 ;
}
radio{
    margin-right: 20px;
}
.grid { display: -webkit-box; display: box; }
.col-0 {-webkit-box-flex:0;box-flex:0;}
.col-1 {-webkit-box-flex:1;box-flex:1;}
.fl { float: left;}
.fr { float: right;}Der Code von index.js lautet wie folgt :
Page({
  data: {
    showModalStatus: false
  },
  powerDrawer: function (e) {
    var currentStatu = e.currentTarget.dataset.statu;
    this.util(currentStatu)
  },
  util: function(currentStatu){
    /* 动画部分 */
    // 第1步:创建动画实例
    var animation = wx.createAnimation({
      duration: 200,  //动画时长
      timingFunction: "linear", //线性
      delay: 0  //0则不延迟
    });

    // 第2步:这个动画实例赋给当前的动画实例
    this.animation = animation;

    // 第3步:执行第一组动画
    animation.opacity(0).rotateX(-100).step();

    // 第4步:导出动画对象赋给数据对象储存
    this.setData({
      animationData: animation.export()
    })

    // 第5步:设置定时器到指定时候后,执行第二组动画
    setTimeout(function () {
      // 执行第二组动画
      animation.opacity(1).rotateX(0).step();
      // 给数据对象储存的第一组动画,更替为执行完第二组动画的动画对象
      this.setData({
        animationData: animation
      })

      //关闭
      if (currentStatu == "close") {
        this.setData(
          {
            showModalStatus: false
          }
        );
      }
    }.bind(this), 200)

    // 显示
    if (currentStatu == "open") {
      this.setData(
        {
          showModalStatus: true
        }
      );
    }
  }

})Das obige ist der detaillierte Inhalt vonEinführung in die Methode zum Entwickeln einer Popup-Seite mithilfe des WeChat-Applets. Für weitere Informationen folgen Sie bitte anderen verwandten Artikeln auf der PHP chinesischen Website!


